Kangaroo Hop WTO (id:#56071)
Prior Publication: AH: The General #31.6: ASL G43
See Also: Kangaroo Hop by Multi-Man Publishing Kangaroo Hop by Avalon HillMont Lambert, France
1944-09-17 (50 others)
ABtF01: The Prize (HASL 6 - A Bridge Too Far)
ABtF CG I: Block by Bloody Block (HASL 6 - A Bridge Too Far)
ABtF CG III: A Bridge Too Far (HASL 6 - A Bridge Too Far)
A 32: Zon with the Wind (AH:ASL Annual `91)
BB11: Kangaroo Hop (Backblast # 2)
G43: Kangaroo Hop (AH:The General # 31.6)
S14: 88s at Zon (ASL Starter Kit #2)
TB 1: Breaking In (Arnhem: The Third Bridge (1st Ed.))
TB CG 1: Taking the Prize (Arnhem: The Third Bridge (1st Ed.))
RP 6: Slam Dance (Rout Pak I)
M4: Tiger Route (Rout Report # 1)
Z11: Slam Dance (Rout Report # 4.4)
FE 125: Lessons Learned the Hard Way (Oblivion Pack)
GSTK 3: Real Men Stay in School (God Save the King)
GSTK 4: The Pillbox (God Save the King)
GSTK CG 1: God Save the King (God Save the King)
MM98-D: Climax at the Mures Defile (March Madness `98 Pack)
CAW11: Operation Wellhit (Canada At War 2)
PJ1.3: Gough, Forward!!! (OAF Playtester's Journal # 1)
PJ1.4: Grave Bridge (OAF Playtester's Journal # 1)
PJ2.4: Horrock's XXXth Corps (OAF Playtester's Journal # 2)
SE5.2: Rough Road to Arnhem (OAF Special Edition # 5)
SP7: Delayed on Tiger Route (Schwerpunkt # 1)
SP104: Easy's Bridge (Schwerpunkt # 9)
SK 1: The Long Left Flank (ASL Digest # 3.10)
Mission 3: Hell’s Highway (Band Of Brothers)
RPT6: Cadets and Cadre (Rally Point # 1)
1: Tiger Route (Witches Cauldron: Oosterbeek Perimeter)
6: Valley of the Dead (Peleliu: White Beach One)
ATB1: Night March (Arnhem: The Third Bridge (4th Ed.))
BB 22.1: Less Than Expected (Coastal Fortress)
BBD # 1: Tiger Route (Brave But Doomed)
BBD # 2: Brave But Doomed (Brave But Doomed)
VV57: Tiger Route (Vae Victis HS #11)
ASL WO16: Wildcat Strike (Winter Offensive Bonus Pack 2015)
CA!12: Steel From Stalin (Counterattacks 2)
SB5: Stampede of the Wild Buffaloes (ASL Journal #11)
188: Zon with the Wind (ASL 3a - Yanks (2nd Edition))
Pegasus 1: Problemet Krafft! (Unknown)
#1: New Street Brawl (Battle at Best)
#2: Incident At The Crossroads (Battle at Best)
#7: Snap Back (Monte Altuzzo: Gothic Line 1944)
Q16: Defence of St. Oedenrode (Quick 6 Scenario Pack III)
WO37: The Vital Hours (Winter Offensive Bonus Pack 2021)
BISt #4: New Allies (Steel And Blood)
HFP #8: Along The Opalos-Vilagos Line (Freedom's Price - Hungary 2)
DB183: St. Oedenrode Bridge (Dispatches from the Bunker #57)
GJ137: Krafft's Blocking Line (Part I) (Grumble Jones)
GJ137: Krafft's Blocking Line (Part II) (Grumble Jones)
AR1: Broken Column ( ASL Arnhem 2024)
Designer: Shawn Kenny
Starter kit scenario?: Deluxe scenario?:
Balance:
CanadianGerman
Overview:
Mount Lambert offered a vantage point over the key French port of Boulogne and was critical to its defense. After an aerial and artillery bombardment, the Canadian 3rd Infantry Division's 9th Brigade, following tanks of the 10th Armoured Regiment, pressed the attack by advancing the Kangaroos of the 1st Canadian Armored Personnel Squadron.Attacker: Canadian (North Nova Scotia Highlanders, 1st Canadian Armoured Personnel Carrier Squadron, Fort Garry Horse / 87th Squadron, Royal Engineers)
Defender: German (Bodenständige Division 326)
5.5 turns
Players: 2 OBA: German Night: No| Unit Counts: |
| Squads: A:7.5 D:7.0 |
| AFVs: A:13 Sherman VC(a) Sherman V(a) x 3 Churchill AVRE x 2 Churchill Crocodile Ram Kangaroo(a) x 6 |
| AFVs: D:0 |
| Guns: A:0 D:2 7.5cm PaK 97/38 5cm PaK 38 |
| Misc Rules: | A: FTV (D3.6), Cloaking (E1.4) for Passengers |
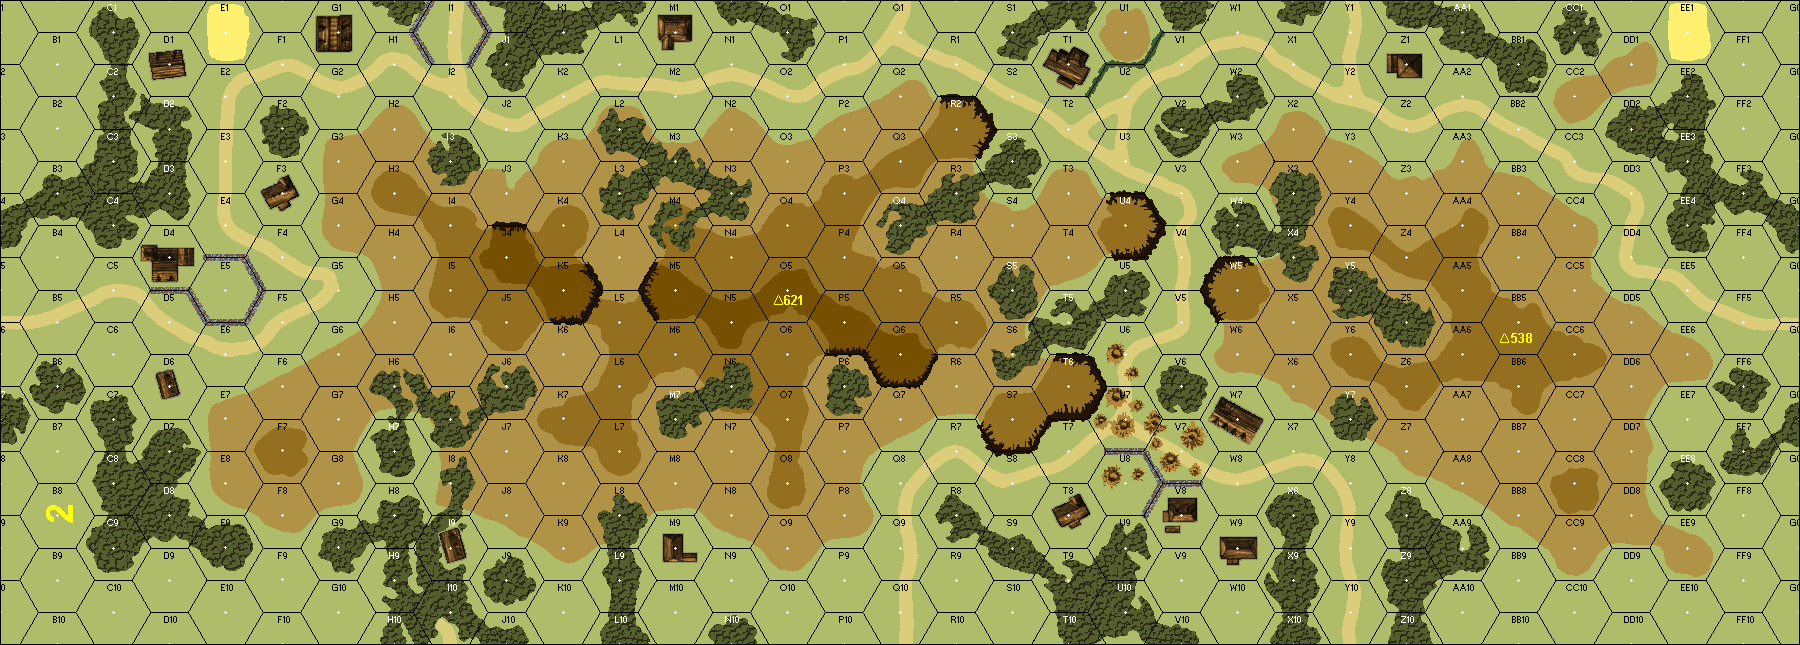
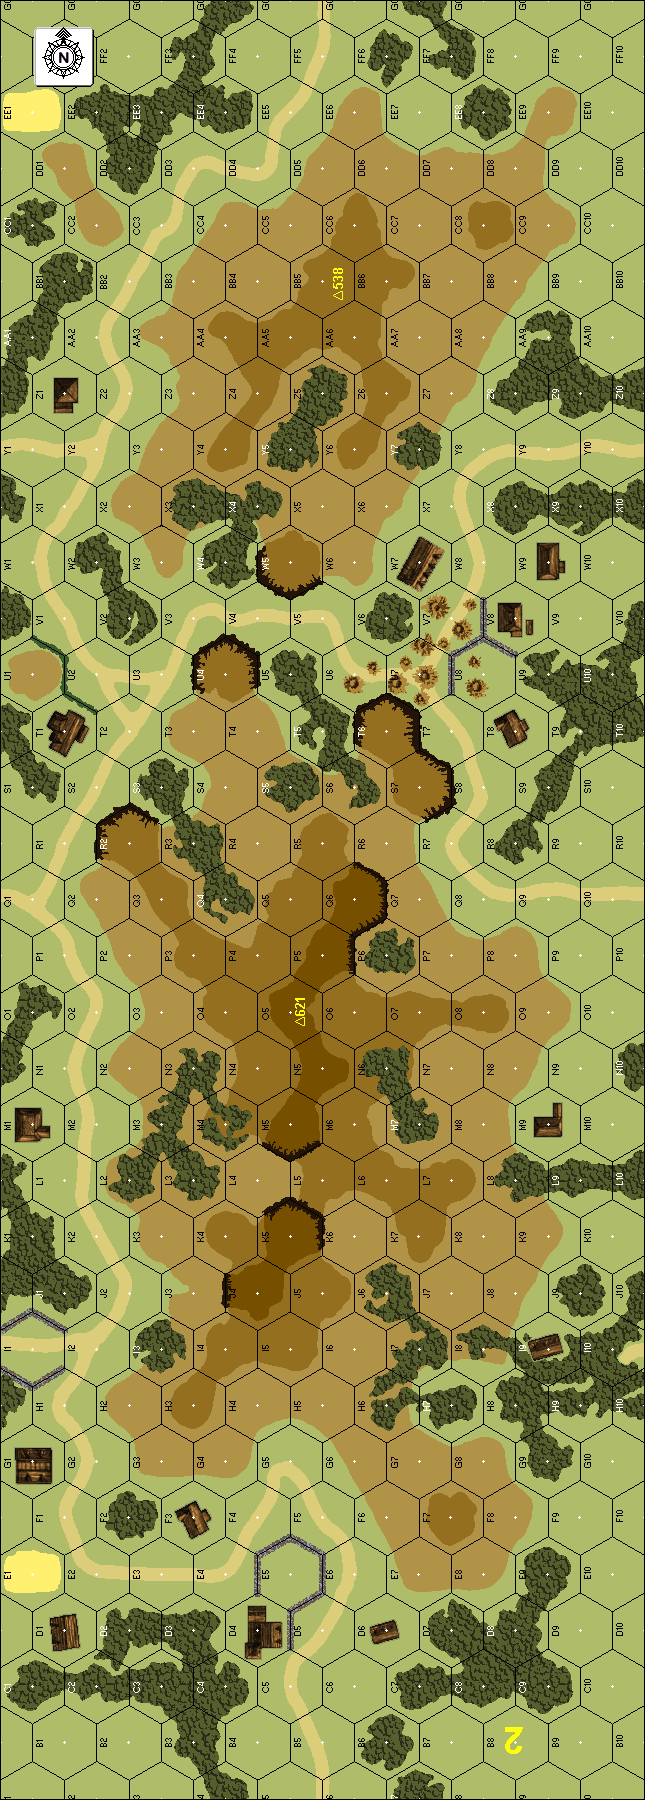
| Map Board(s): |
| Publication | Board |
|---|---|
| ASL 1 - Beyond Valor (3rd Edition) | 2 |
| Overlays: | NONE |
Errata (source)
| In SSR 6 replace “150+mm OBA” with “100+mm OBA”. Replace British balance with “In German setup, delete “using HIP (regardless of terrain)” and delete SSR 5”. | MMP |
Players wanting to play this game/Request a match:
Scenario info
Last Played:
| Date | Reporter | Opponent | Bal. | Result | Time | Comments | |
|---|---|---|---|---|---|---|---|
| 2022-01-19 | (A) Scott Sherer | vs | Jeff B | Canadian win | An interesting scenario with lots of things to consider...more so from the Canadian perspective with all of the AFV capabilities they possess. My general strategy was to avoid the direct frontal attack and try to encircle the hill by sending most of the 'Roos with infantry around the right (southern) flank and send a mobile force of AFV's up the valley road between the two hill masses to flank from the other side. Only the AVRE's (without fascine) would come up the middle, probing the hill directly and hopefully getting close enough to the summit to get the Petard in action and maybe provide some DC's via the crew to assault any pillboxes there. One AFV with the AL went to the northern hill mass to provide some scouting and direct fire/smoke support, which turned out to be very fortunate as the Germans had a pillbox with an AT gun in CC8 so it was brought on board fairly quickly. The infantry made reasonable progress in the south until the German artillery came into play, with a harassing fire FFE1 that broke I think five 8ML half-squads on 6(0) attacks. Meanwhile one tank was knocked out around the east side of the hill by the aforementioned AT gun in CC8 and my Croc was making very slow progress up the hill trying to get into position to use its feared FT. The SW FT was able to get safely into the CA of a pillbox in J4 thanks to cover provided by a Kangaroo and flame it to allow supporting infantry to capture those two Level 3 hexes. However, things weren't going well for the Canadians and it appeared they wouldn't have enough push to take the summit. However, the AFV on the northern hill mass was able to put some smoke into CC8 which limited the effectiveness of the AT gun there (until it eventually malfed and rolled a 6 on its repair attempt) and two straight poor rolls on radio contact prevented any additional OBA from slowing down the Canucks. The Kangaroos were able to carry the summit, supported by just enough infantry to control the pillboxes. This one seemed to be more fun from the Canadian perspective with lots of unique AFV's with interesting capabilities. The Germans get to set up a static defense of wire, mines and AT ditches but then just hang out and watch to see if the Canadian player can overcome the obstacles. Jeff did a masterful job making use of the wire and AT ditches in conjunction with the cliff hexsides to really limit the maneuverability of the Canadians, but luck deserted him in the end. I ended up winning without the Croc getting off a single shot... | ||
| 2022-01-19 | (D) Jeff B | vs | Scott Sherer | Canadian win | 8.5 hrs | Canadians surprised me by making a strong push up from the south but, as Scott said, the west was bound to be protected strongly with forts - which it was. This would be one of those rather boringly static defensive games, where I would rely on forts and concealment to keep me safe. As Grumble Jones mentioned in his blog, I was under the misunderstanding that AT ditches connected to opposite hexes like wire. I agree it should be part of the standard ruleset, as without this it renders their effectiveness much more impotent. Turn 2 saw the Canadians lose one of two Shermans on their sweep around the east to my 50L in the south, but its position (as well as my radio operator's) would prove to be safe but rather limiting. Meanwhile I broke my much-needed 75mm, never to return. Turn 3 was bad for me. Having lost awareness of the position of his FT, I allowed him to move up concealed point blank and blast my PB contents. Meanwhile the first of what would be two full squads of mine turning berserk met their doom. He did gack CC versus my broken PB boys, but was finally positioned on a Level 3 hill, which meant my days of skulking on and off the crest while maintaining concealment were over. Turn 4 saw his FT run out of juice, him lose a 9-1 to a sniper, and my OBA finally get a chance to wreak some devastation, but at this point the writing was on the wall for me - I simply had not knocked out enough vehicles. Turn 5 saw this remedied to a degree when I knocked another out with my smoked-in 50L and a PF, and I still had hope that my hard-to-reach northernmost PB would hold out (the HS occupying it having broken/rallied/broke/rallied), but Scott made a very bold move advancing a crew into the hex to risk 1:2 CC, surviving, and limiting my ability to potentially reinforce the PB. When we wiped each other out in CC at the end of his turn it was game over. I wouldn't say this was a boring game, but I'm just not much of a fan of vehicle swarming scenarios when the defender has limited options. | |
| 2021-01-23 | (A) Dan Best | vs | Kermit Mullins | Canadian win | |||
| 2021-01-23 | (D) Kermit Mullins | vs | Dan Best | Canadian win | Dan's Canadians romped around my anti-tank ditch and mines to get into my backfield while the flame tank turned my bunkers into ovens. I gave the concession after 4 turns. My Germans were baked. | ||
| 2020-09-25 | (A) Kevin Duval | vs | Dwayne Duval | German win | Canadians could not pull it off. All AFV were poorly positioned to add any fearsome fire power where or when it was needed most. Could not root out final defenders of last Pillbox. |
| Action | Date |
|---|---|
| Hutch Modified the unit counts | 2025-03-06 00:46:46 |
| Hutch Modified the Attacker's AFVs | 2025-03-06 00:46:46 |
| Hutch Modified the misc. rules | 2025-03-06 00:44:39 |
| Turuk Modified the gps location | 2024-07-05 14:03:44 |
| Bongiovanni Added a playing | 2022-08-24 10:45:15 |
| File | Description | User | Views |
|---|---|---|---|
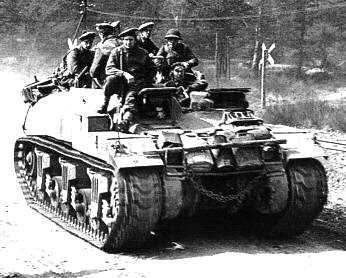
| Scottish troops move uo to the front on Kangaroo APCs (kang.jpg) | Image | King Billy | 1474 |
| (canad-germ.png) | Image | hoxson1 | 1038 |
| (asl106.gif) | Map Image | Twirling | 1298 |
| (G43.png) | Map Image | hipsu | 1232 |
| Description | Uploaded by |
|---|
| Title | Author | Date |
|---|
| Description | Uploaded by |
|---|
Location
Images
Scottish troops move uo to the front on Kangaroo APCs
| Statistics: | |
| Avg Rating: 6.25 | Votes: 12 |
| Views: | 8135 |
| To-Play list count: | 4 |
| Estimated Play time: | 5.4 hours |
| Recorded Games: | 7 |
| Archive recorded plays: | ||
| Canadian | 4 | |
| German | 3 | |
| Drawn: | 0 | |
| ROAR Data: (as of today) Kangaroo Hop [Log in to Confirm or Edit] |
| [A] Canadian | 6 |
| [D] German | 8 |


