Four Stars of Valor WTO (id:#66780)
Nijmegen, The Netherlands
1944-09-20 (51 others)
25: Gavin's Gamble (ASL 3 - Yanks)
ABtF07: Among the Bravest (HASL 6 - A Bridge Too Far)
ABtF08: God Save the King! (HASL 6 - A Bridge Too Far)
U04: Climax at Nijmegen Bridge (G.I.'s Dozen)
TB 6: Grinding Forward (Arnhem: The Third Bridge (1st Ed.))
TB 7: Damn and Blast (Arnhem: The Third Bridge (1st Ed.))
TB 8: The End? (Arnhem: The Third Bridge (1st Ed.))
CH 51: The Sonnenburg Hotel (Critical Hit # 3.1)
Z23: Setting the Woods on Fire (Rout Report # 5.2)
GSTK 2: House G (God Save the King)
GSTK 6: Block by Bloody Block (God Save the King)
RBF 8: Germeter by Meter (Recon by Fire! #1)
TOT 40: Ring of Fire (Time on Target # 3)
O74.1: Running a Mook (On All Fronts # 74)
SP131: Pocket Panzers (Schwerpunkt #11)
TAC9: Stutzpunkt Lezongar (Tactiques # 1)
SC12: Climax at Nijmegen Bridge (ASL Digest # 3.07)
NEV1: Making a Break for It (Nor'easter V)
SP141: Broken Beek (Schwerpunkt #12)
S23: Monty's Gamble (ASL Starter Kit #3)
3: Piercing the Veil (Witches Cauldron: Oosterbeek Perimeter)
4: Stand and Die (Witches Cauldron: Oosterbeek Perimeter)
5: Till the Woods Run Red (Witches Cauldron: Oosterbeek Perimeter)
WO04: I Don't Like Retreating (Winter Offensive Bonus Pack # 2 2011)
ATB6: Grinding Forward (Arnhem: The Third Bridge (4th Ed.))
ATB7: Damn and Blast (Arnhem: The Third Bridge (4th Ed.))
ATB8: The End of the 2nd Battalion (Arnhem: The Third Bridge (4th Ed.))
FT173: A Misstep in Lorraine (From The Cellar Pack # 7)
J155: It's Hardly Fair (ASL Journal #10)
BBD # 3: Piercing The Veil (Brave But Doomed)
BBD # 4: Stand And Die (Brave But Doomed)
BBD # 5: Until The Woods Run Red (Brave But Doomed)
OO11: Hill 235 (Operation Olive - Gothic Line 1944)
OO13: Counter-Attack at Montecieco (Operation Olive - Gothic Line 1944)
OO14: Back and Forth (Operation Olive - Gothic Line 1944)
OO15: The Charge of the Queen's Bays (Operation Olive - Gothic Line 1944)
OO16: Riposte (Operation Olive - Gothic Line 1944)
AL01: It's Hardly Fair (Fanatic Enterprises: Internet)
YASL#7: Making a Break for It (Nor'easter XX)
25: Gavin's Gamble (ASL 3a - Yanks (2nd Edition))
GS10K: Gunapalooza (ASLOK 2012)
TD 2: Ommeray: Duel of Commandos (Trench of Death #1)
JF 9: Among the Bravest of the Brave (Jitter Fire III)
S70: A Sideshow Affair (ASL Starter Kit #4)
S87: Straight and Fast (ASL Starter Kit Bonus Pack #2)
DTF-16: Panther Cull (Not One Step Back)
GJ101: Van Lennepweg’s Garden (Grumble Jones)
GJ104: Brothers at the Crossroad (Grumble Jones)
CH 51: The Sonnenburg Hotel (Critical Hit #3.1 2022 Reprint)
J210: Moment of Truth (ASL Journal #13)
FT INOR19: “Pointed Stone” Broken (Inor Players Guide)
Designer: Bill Cirillo & Sean Deller
Starter kit scenario?: Deluxe scenario?:
Balance:
AlliedGerman/German (SS)
Overview:
The timely capture of a bridge across the Waal River in the city of Nijmegan was one of the keys in Operation MARKET-GARDEN, and a task that would fall to the British Guards Armoured Division and the American 82nd Airborne Division. The attacking elements were divided into two task forces. while the Eastern Force was charged with assaulting the main road bridge across Waal, the Western Force, including Lt. Colonel Benjamin Vandervoort's Company D, 2nd Battalion, 505th Parachute Infantry Regiment, was given the job of capturing the nearby railroad bridge. By the afternoon of 19 September, both forces were in position to begin a simultaneous assault on the two objectives. Unfortunately for the attacking Allies, the Germans had had ample time to heavily reinforce the southern areas around the two bridges with approximately 2,000 defenders supported by armor and direct fire ordnance pieces. The area in front of the railroad bridge was defended by Kampfgruppe Henke, commanded by Oberst Fritz Henke, under the overall direction of Kampfgruppe Frundsberg.Attacker: Allied ((American) Company D, 2nd Battalion, 505th Parachute Infantry Regiment, 82nd Airborne Division and (British) No. 2 Company, 1st Battalion and No. 3 Squadron, 2nd Battalion, Grenadier Guards, 5th Armoured Brigade, Guards Armoured Division)
Defender: German/German (SS) (Fallschirmjäger-Ausbildung-Regiment, Kampfgruppe Henke with Bataillon II. SS-Panzergrenadier-Regiment 21, SS-Panzer-Division 10 "Frundsberg", Kampfgruppe Frundsberg and Kompanie 4, FlaK-Battalion 572 and SS-Panzerjäger-Abteilung 10, Kampfgruppe Euling)
6.5 turns
Players: 2 OBA: None Night: No| Unit Counts: |
| Squads: A:18.0 D:14.5 |
| AFVs: A:6 Sherman VC(a) Sherman V(a) x 3 Carrier A x 2 |
| AFVs: D:4 JgdPz IV x 2 SPW 251/1 x 2 |
| Guns: A:0 M2 60mm Mortar D:4 8.8cm FlaK 18 2cm FlaK 38 x 2 4.7cm PaK 185(b) |
| Misc Rules: | Rooftops (B23.8), D: 3 ground level Fortifications (B23.9), Late War SS (A25.111) |
| Map Board(s): |
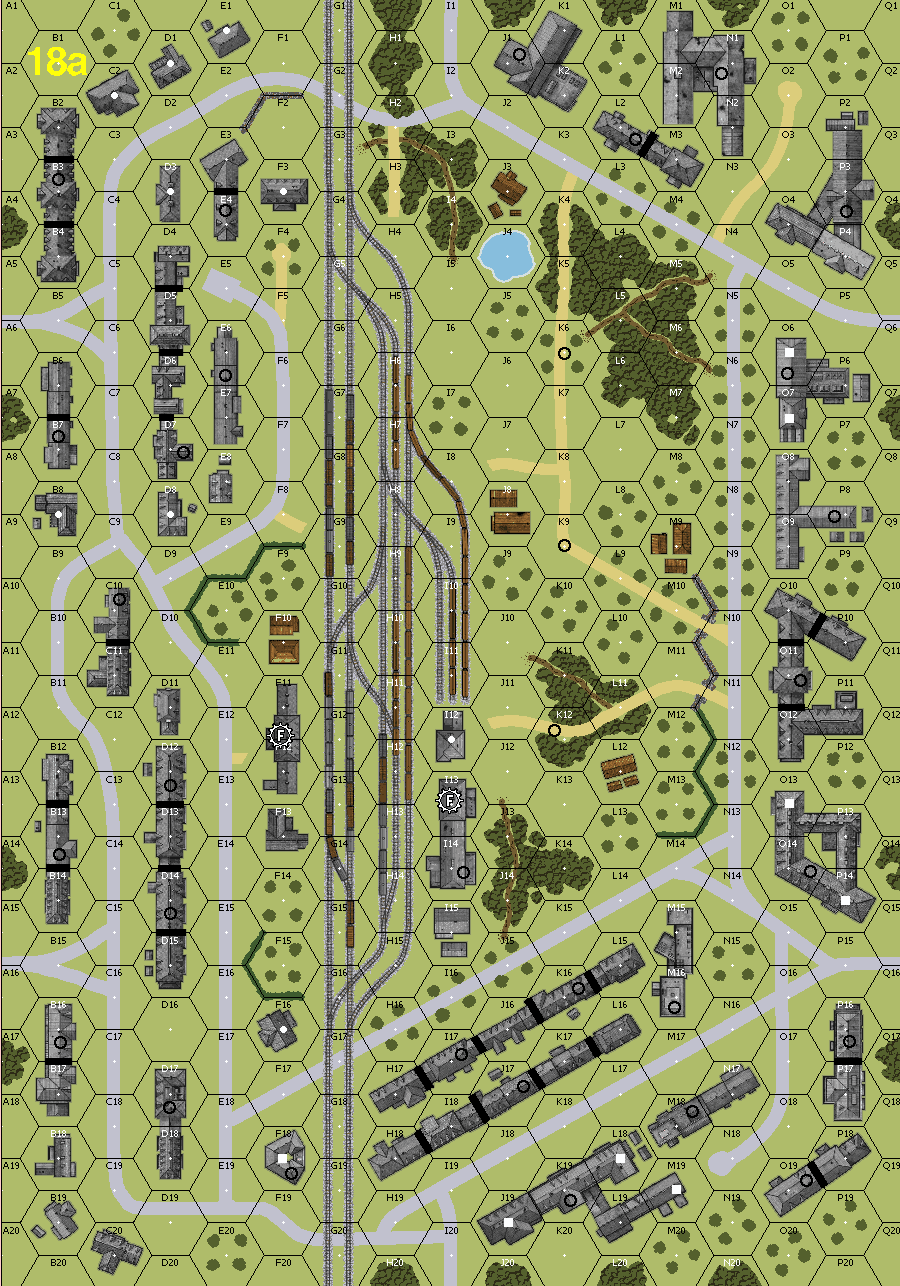

| Overlays: | RC13 | RY8 | X32 | X33 | X37 | X38 |
Errata (source)
| In the British WFP table, change “50MTR” to “51MTR” | ASL Journal 17 |
Players wanting to play this game/Request a match:
Scenario info
Last Played:
| Date | Reporter | Opponent | Bal. | Result | Time | Comments | |
|---|---|---|---|---|---|---|---|
| 2026-11-05 | (D) Jeff B | vs | Magnus Rimvall | German/German (SS) win | 7.75 hrs | I took a gamble and setup my MMG under wire in 18aQ15 to lay a FL for the entering Allies. I had him covered with the HT and 47AT in case a carrier should threaten him, and with a PSK in case of a Sherman. Thankfully it worked as planned and delayed them a turn, as well as costing them a Brit squad. I then abandoned and stripped the HT of its LMG, and repositioned my MMG in O13 for the next FL. Unknown to me, Magnus had a lot of Ami dummies to make his attack in the west look much more threatening. I had my fair share as well on both fronts. The Amis took a punch on the nose Turn 2 trying to cross the RR tracks, losing a HS, wounding and breaking the 8-1, and seeing 1.5 squads run for cover. The Brits made inroads in the first 18a factory, followed closely behind by a lot of Ami muscle. I lost a couple dummies on the bottom of the turn. Turn 3 saw the Allies used brute force to eliminate 1.5 German squads as they captured the first factory but, despite saying he'd probably regret it, Magnus risked parking the Firefly on the 18a E road. He paid the price when the 88L popped up in the very obvious E10, blasting both the Firefly and a carrier to smithereens, stopping only because he was out of targets. The much-welcomed StuGs entered and parked in front of the B7 rowhouse, as it was apparent to me that his plan was to eliminate me from the RR vicinity. So Turn 4 saw him change that plan and make more of a push on the 19a factories. At times he moved too aggressively, and it cost him a LOT of exposed dummy stacks. Inroads were again made in the 2nd 18a factory. The Germans lost a HS to combat, and another on boxcar rallying. Turn 5 was a disaster for the Allies after they risked opp firing most of their units in the factory while their HS friends stripped my wall of concealment. I allowed the placement of a DC in one fortified hex, wanting to take my chances on the whole stacks in DFPh. Meanwhile his press on the factory in the west was rebuffed by some stout shooting by my repositioned StuG (after having destroyed a Sherman), AA gun, and HIP LMG HS. Wire and mines would further constrict his path of advance there. In DFPh my other StuG broke an MMG Ami squad in one factory hex; the 9-2 went down, the DC-placing hero wounded and died, a HS was lost, and the rest of the stack (MMG squad/HS) broke. My squad would pay the price breaking when the DC detonated, but there was now nobody in reach to grab his fortified hex. His Brits survived two servings of PB fire, but failed to break my squad in the other fortified hex. This left them able to grab only one hex of the factory, and this hex was being watched by the 45L AT. After all these setbacks, and with only two turns left, the Allies called off the attack. For whatever reason I had been under the impression that a large chunk of the TotR scenarios used ElRRs, but I was mistaken. This wasn't a bad scenario, and now I'll be more apt to play some of the others. | |
| 2026-02-02 | (A) Dan Owsen | vs | Jeff N | Allied win | |||
| 2025-10-27 | (A) Camille Garek | vs | André ESCOBEDO | Allied win | To the last die roll. | ||
| 2025-03-30 | (A) Kevin Duval | vs | Dwayne Duval | A | German/German (SS) win | Allies captured the need VC buildings but German counter attacks took the CVP cap over the top. | |
| 2025-02-16 | (A) Robert Wiebe | vs | German | Allied win (VASL Log) | 4 hrs | Game was pretty well over when the allies had secured board 19a by end of turn 6, with only three GO German SS squads left on board 18a to deny the first VC choice (on/adjacent-to a RR hex(es)), but they could not get close enough with the last squad attempting such pinning. Very enjoyable scenario, with only one Sherman V and one Jagdpanzer IV left unscathed. The 88 setup on board 18, with excellent fields of fire and destroyed the Firefly and another Sherman before turning to a British leader and accompanying squad, while a Jagdpanzer took out another Sherman. The other German guns were largely ineffective, as were the American bazooka attempts. The Germans retained possession of all three X33 factory locations throughout the scenario, but had no units left alive aside from a lone SPW 251/1 on board 19a. |
View all or balance report
| Action | Date |
|---|---|
| Someone Added a playing | 2026-11-05 18:21:32 |
| Someone Added Errata | 2026-09-05 07:48:50 |
| Someone Added a playing | 2026-02-02 01:11:40 |
| Someone Linked the scenario to ROAR | 2026-01-08 20:19:12 |
| Someone Added a playing | 2025-10-27 19:54:18 |
| File | Description | User | Views |
|---|---|---|---|
| ASL292 Setup File (ASL292 Setup File.vsav) | VASL Setup | Bongiovanni | 1384 |
| (allied-germ.png) | Image | Hutch | 1665 |
| VASL Log file (ASL292_Log.vsav.vlog) | VASL Game Log | Ahriman667 | 1109 |
| ASL292 Mapboard (ASL292.png) | Map Image | Yarlis | 1391 |
| Description | Uploaded by |
|---|
| Title | Author | Date |
|---|
| Description | Uploaded by |
|---|
Quick Map View
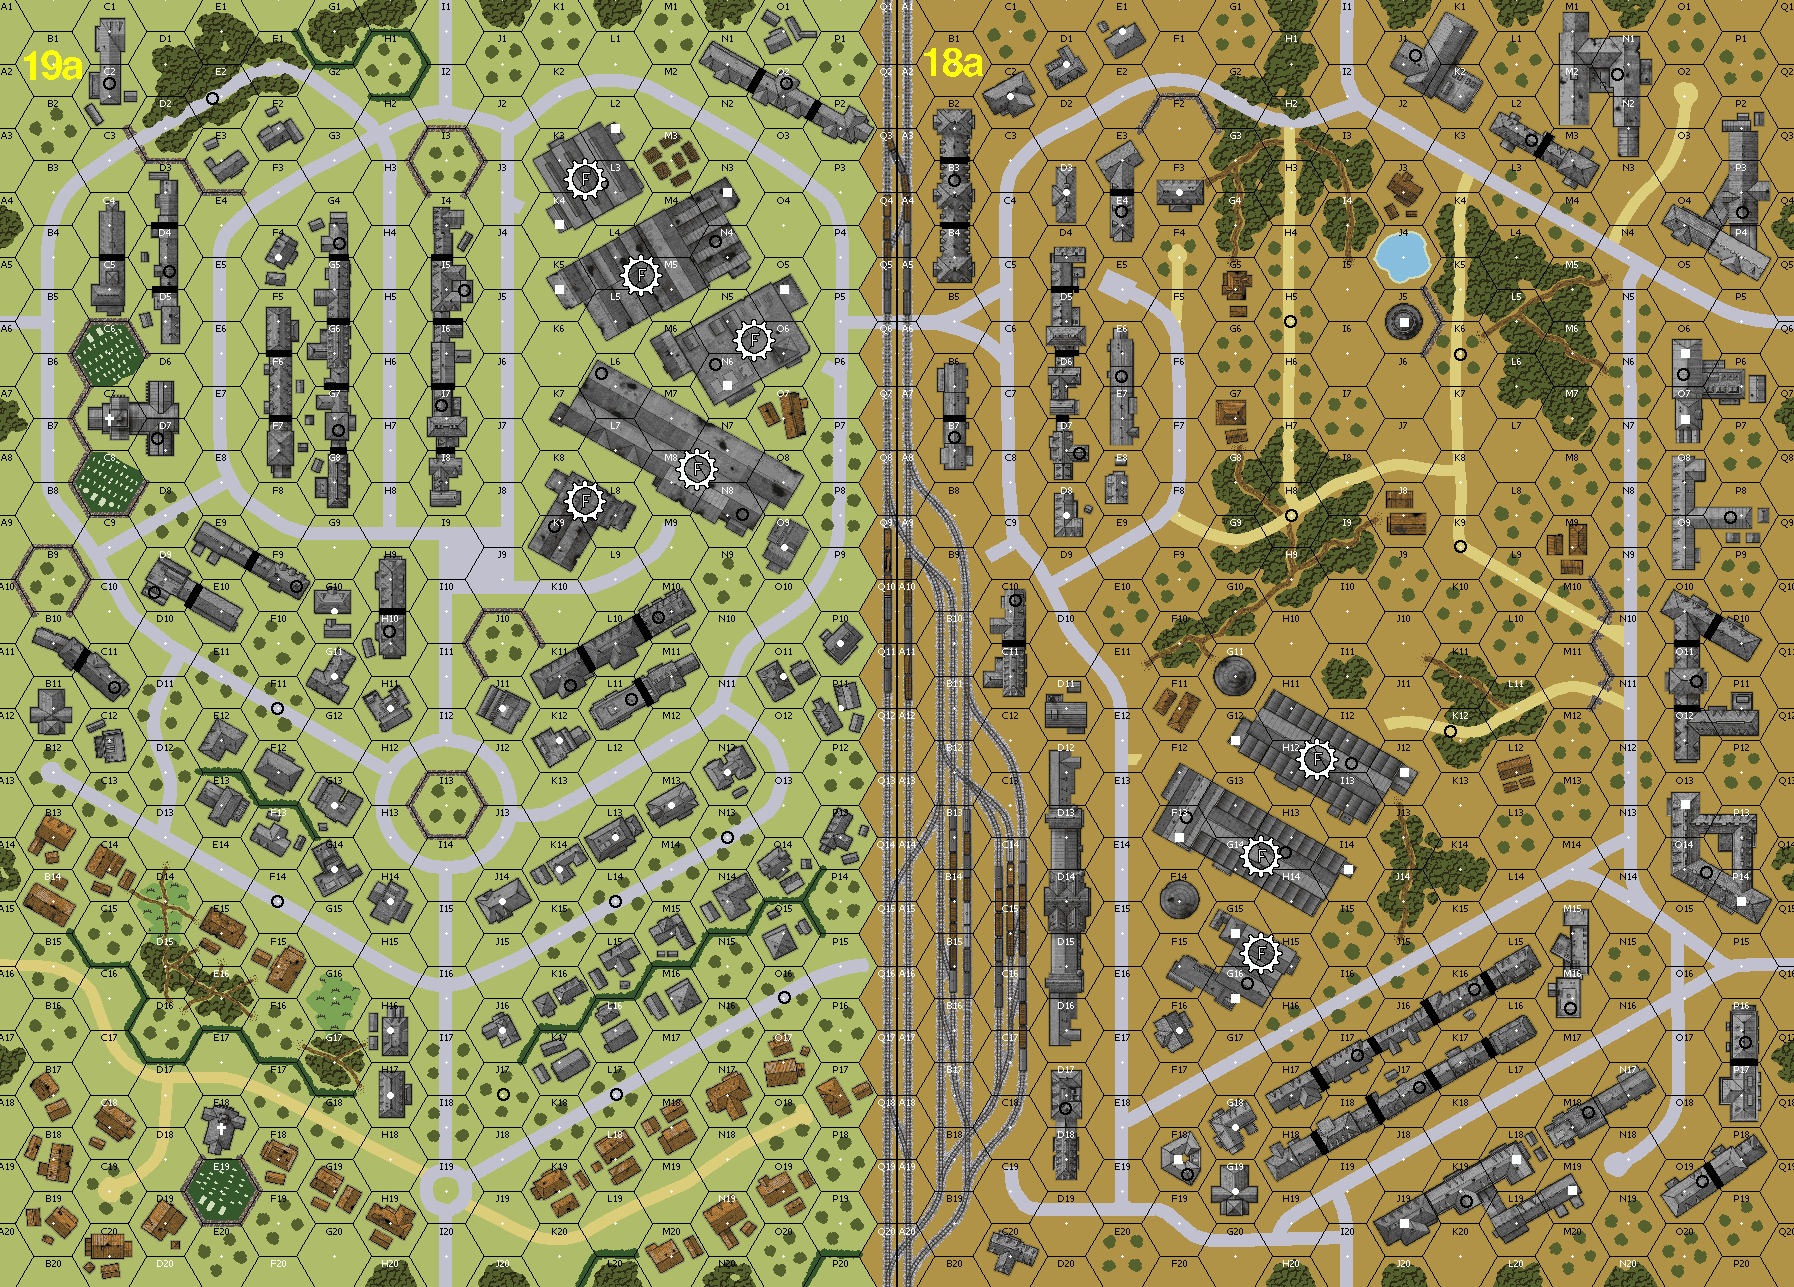
Location
Images

| Statistics: | ||
| Avg Rating: 7.33 | Votes: 18 | Views: | 0 |
| To-Play list count: | 2 | |
| Estimated Play time: | 8 hours | |
| Recorded Games: | 12 | |
| Archive recorded plays: | ||
| Allied | 4 | |
| German/German (SS) | 8 | |
| Drawn: | 0 | |
| ROAR Data: (as of today) Four Stars of Valor [Confirmed] |
| [A] American/British | 8 |
| [D] German | 11 |