End of the Beginning CBI (id:#62085)
Sittang, Burma
1942-02-22 (8 others)
BO 1: Usau Ridge (Breakout! # 42)
SP117: Stranded Cats (Schwerpunkt #10)
SP127: Bleed Gurkha Bleed (Schwerpunkt #11)
VB16: This Monkey's Gone to Heaven (Volfoni Brothers Scenarios)
AP164: Sparrow Force (ASL Action Pack #16 From The Land Down Under)
J234: Buckley's Chance (ASL Journal #14)
J230: Battle for Babau (ASL Journal #14)
J234: Buckley's Chance (ASL European Union Championship 2024)
Designer: Gary Fortenberry
Starter kit scenario?: Deluxe scenario?:
Balance:
JapaneseBritish
Overview:
With British defenses in disarray—the 17th Indian Division was strung out over 15 miles of roads, and jungle – the Japanese pressed even harder for their prize: the bridge at Sittang. Early on the morning of the 22nd the commander of 1st Battalion, 215th Infantry Regiment, Major Mugita, made a hasty decision to press on to the bridge. His battalion was not at full strength, missing its 4th Company, but had divisional assets in an engineer platoon and an MMG section. Believing a coup de main was possible, Mugita launched his men at the colonial troops blocking his way to the bridge approach.Attacker: Japanese (1st, 2nd, 3rd and MG Companies, 1st Battalion, 215th Infantry Regiment, and 1st Engineer Company, 33rd Infantry Division)
Defender: British (4/12th Frontier Force Reginiment, 16th Indian Brigade and 3rd Burma Rifles, 2nd Burma Brigade, and 2nd Battalion, Duke of Wellington's Regiment, 1st Burma Brigade, 1st Burma Division)
8.5 turns
Players: 2 OBA: None Night: No| Unit Counts: |
| Squads: A:26.0 D:29.0 |
| AFVs: A:0 |
| AFVs: D:5 Daimler SC Marmon-Herr. III MFF x 2 Carrier A x 2 |
| Guns: A:0 Type 89 Heavy Grenade-Launcher x 4 D:0 OML 2-in. Mortar x 3 |
| Misc Rules: | PTO, LJ (Exc: brush remains brush, roads/bridges exist) No valleys. |
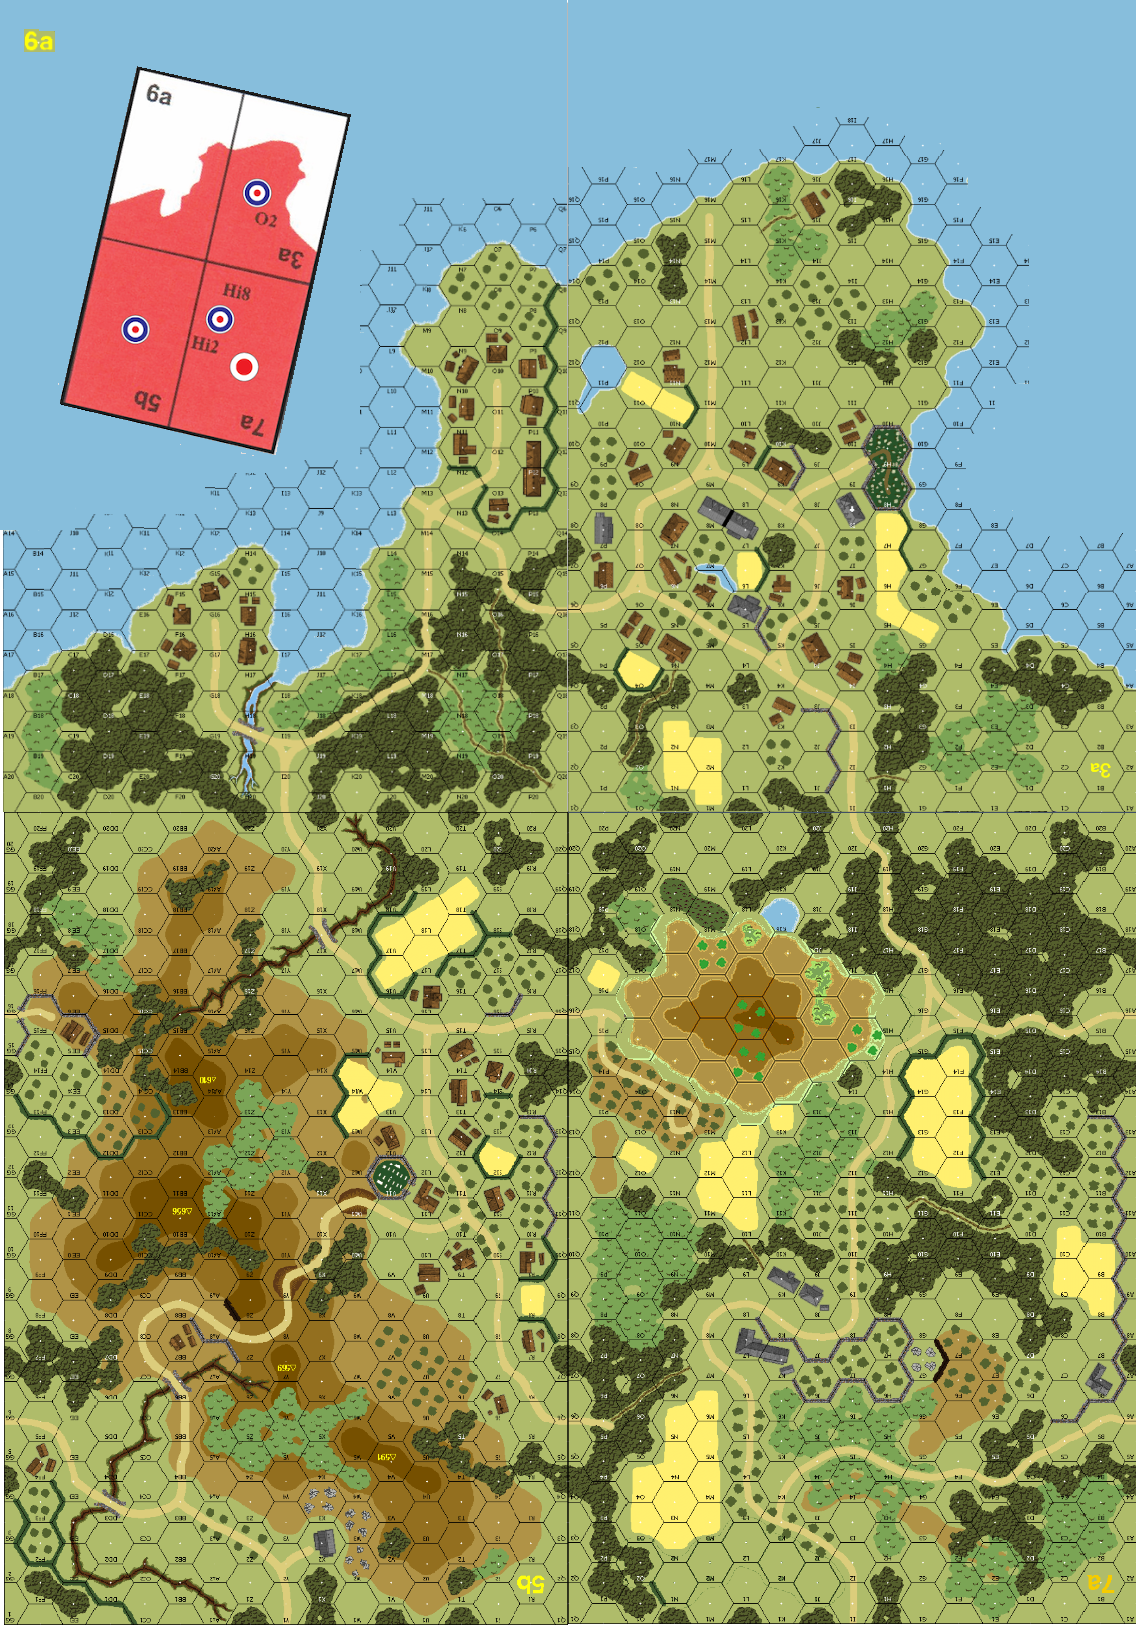
| Map Board(s): |
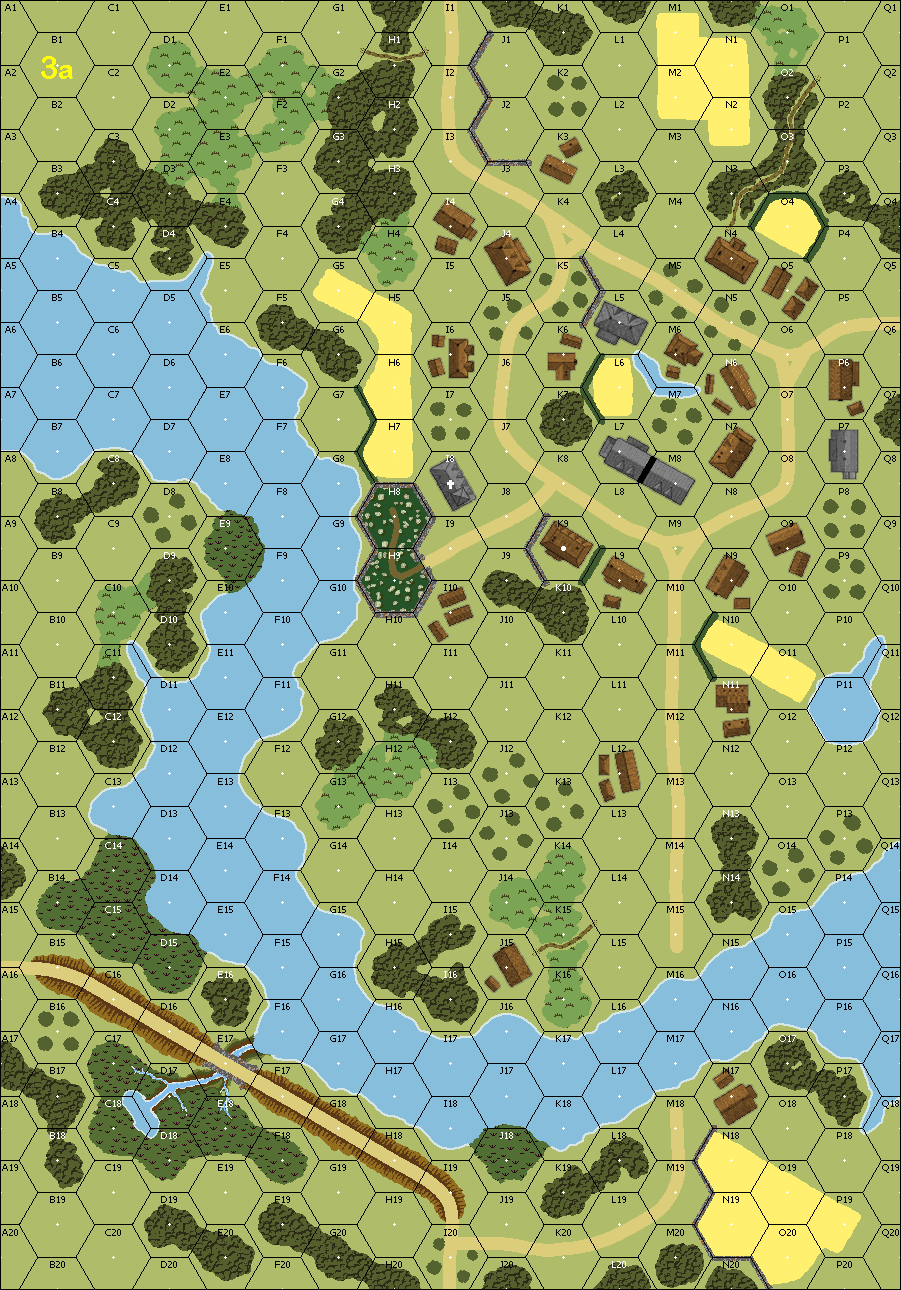

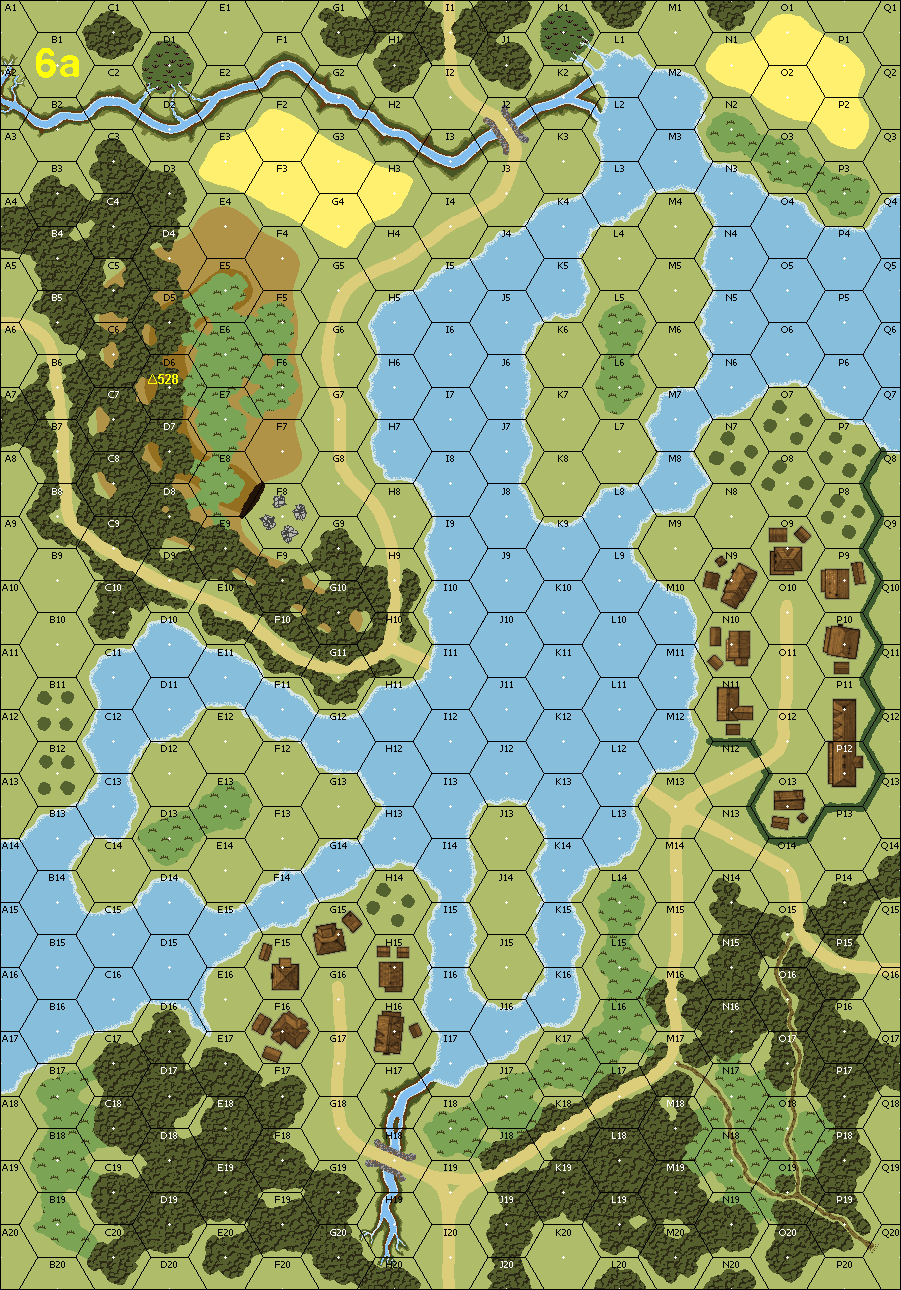
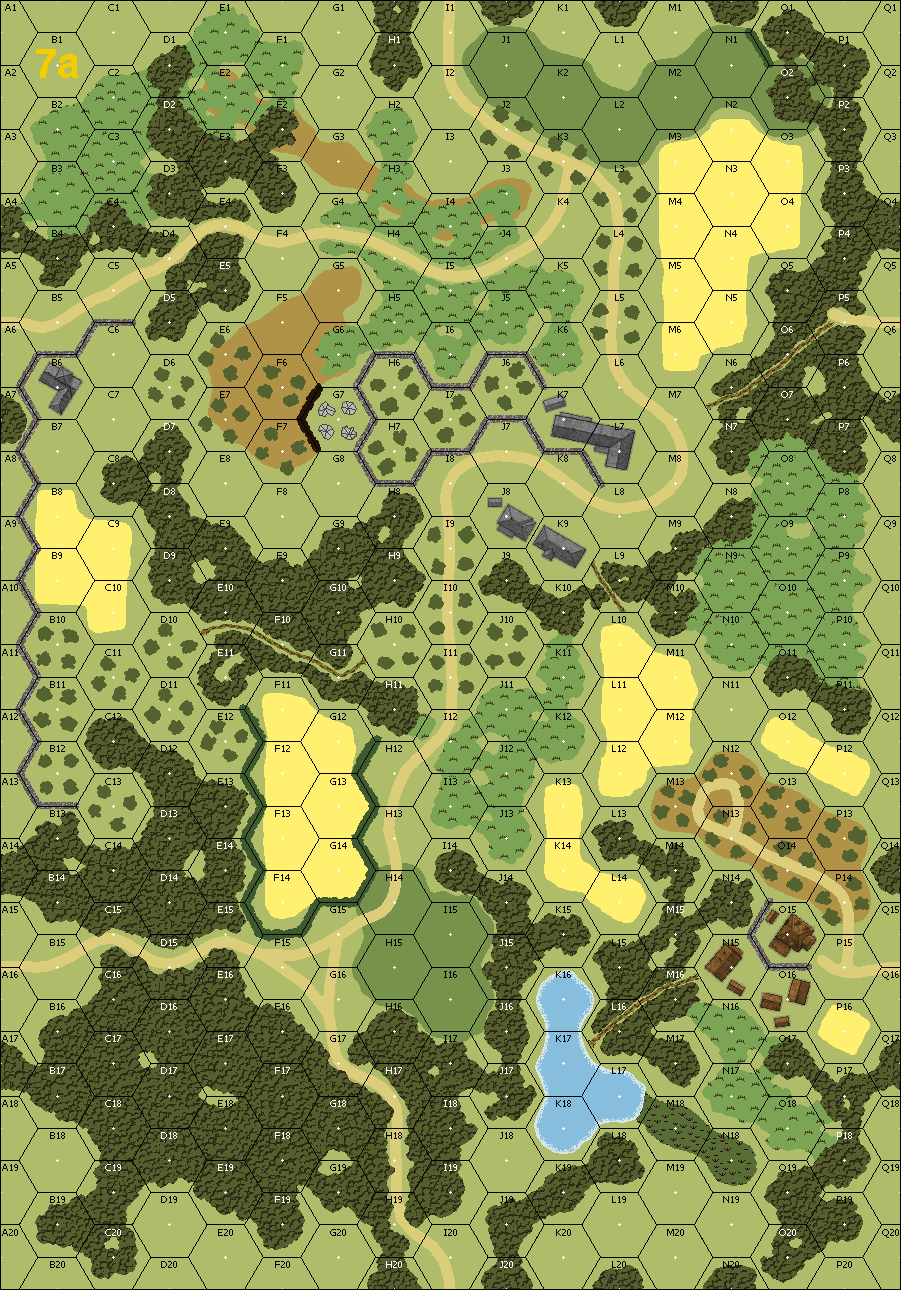
| Overlays: | O2 | Hi2 | Hi8 |
Errata (source)
Players wanting to play this game/Request a match:
Scenario info
Last Played:
View all or balance report
| Action | Date |
|---|---|
| buser333 Added a playing | 2026-03-28 12:03:08 |
| Michel Bongiovanni Added a playing | 2025-10-07 07:12:57 |
| Andruz61 Added a playing | 2025-08-18 17:41:38 |
| Hutch Modified the overview | 2024-04-15 17:54:47 |
| Bongiovanni Added a playing | 2022-09-16 09:23:55 |
| File | Description | User | Views |
|---|---|---|---|
| (jap-brit sm.png) | Image | hoxson1 | 1733 |
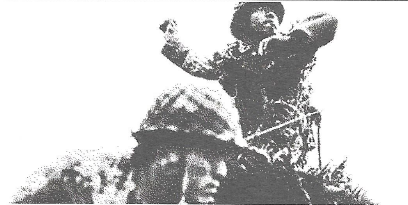
| (jap grenade toss.png) | Image | hoxson1 | 1543 |
| (ap92_map_with_overlays.png) | Map Image | hoxson1 | 1605 |
| Description | Uploaded by |
|---|
| Title | Author | Date |
|---|
| Description | Uploaded by |
|---|
Quick Map View
Location
Images

| Statistics: | ||
| Avg Rating: 6.44 | Votes: 9 | Views: | 6115 |
| To-Play list count: | 7 | |
| Estimated Play time: | 12.6 hours | |
| Recorded Games: | 12 | |
| Archive recorded plays: | ||
| Japanese | 5 | |
| British | 7 | |
| Drawn: | 0 | |
| ROAR Data: (as of today) End of the Beginning [Log in to Confirm or Edit] |
| [A] Japanese | 24 |
| [D] British | 32 |