Empire's Fall CBI (id:#62080)
Moulmein, Burma
1942-01-31 (3 others)
J12: Jungle Fighters (ASL Journal # 1)
Mission 8: Not So Much Of A Safe Haven (Jumping Cats)
MMP01: Jungle Fighters (MMP News)
Mission 8: Not So Much Of A Safe Haven (Jumping Cats)
MMP01: Jungle Fighters (MMP News)
Designer: Gary Fortenberry
Starter kit scenario?: Deluxe scenario?:
Balance:
JapaneseBritish
Overview:
Moulmein – the third largest city in Burma with nearly 100,000 residents and long loyal to the Crown – clings to the eastern bank of the mouth of the Salween River. Its all-weather airfield, and position astride an important transportation route as well as being the guardian of the eastern approaches to the Sittang Bridge, made it an imperative objective for any would-be invader. Japanese Army planners knew this and made Moulmein’s capture the primary objective before striking for the Sittang Bridge and on to Rangoon. British planners were hampered by its nearly indefensible position. With little to no river gunboat presence, and no reliable river transportation available, holding the eastern bank would be very costly. The decision was made to hold Moulmein with colonial troops and provincial police forces in order to slow down the invader – hopefully long enough for the defenses around Sittang Bridge to gel.Attacker: Japanese (2nd and 3rd Battalions, 143rd Infantry Regiment, 55th Infantry Division)
Defender: British (60th Field Engineer Company, Madras Sappers and Miners, 4/12th Frontier Force Regiment, 7th Burma Rifles, 16th Indian Brigade, 1st Burma Division and 4/12th Frontier Force Regiment and 8th Burma Rifles, 2nd Burma Brigade, 1st Burma Division and Lig)
9.5 turns
Players: 2 OBA: Both Night: No| Unit Counts: |
| Squads: A:29.0 D:35.0 |
| AFVs: A:0 |
| AFVs: D:0 |
| Guns: A:0 Type 89 Heavy Grenade-Launcher x 3 D:4 OML 2-in. Mortar x 2 OQF 40mm AA x 4 |
| Misc Rules: | PTO |
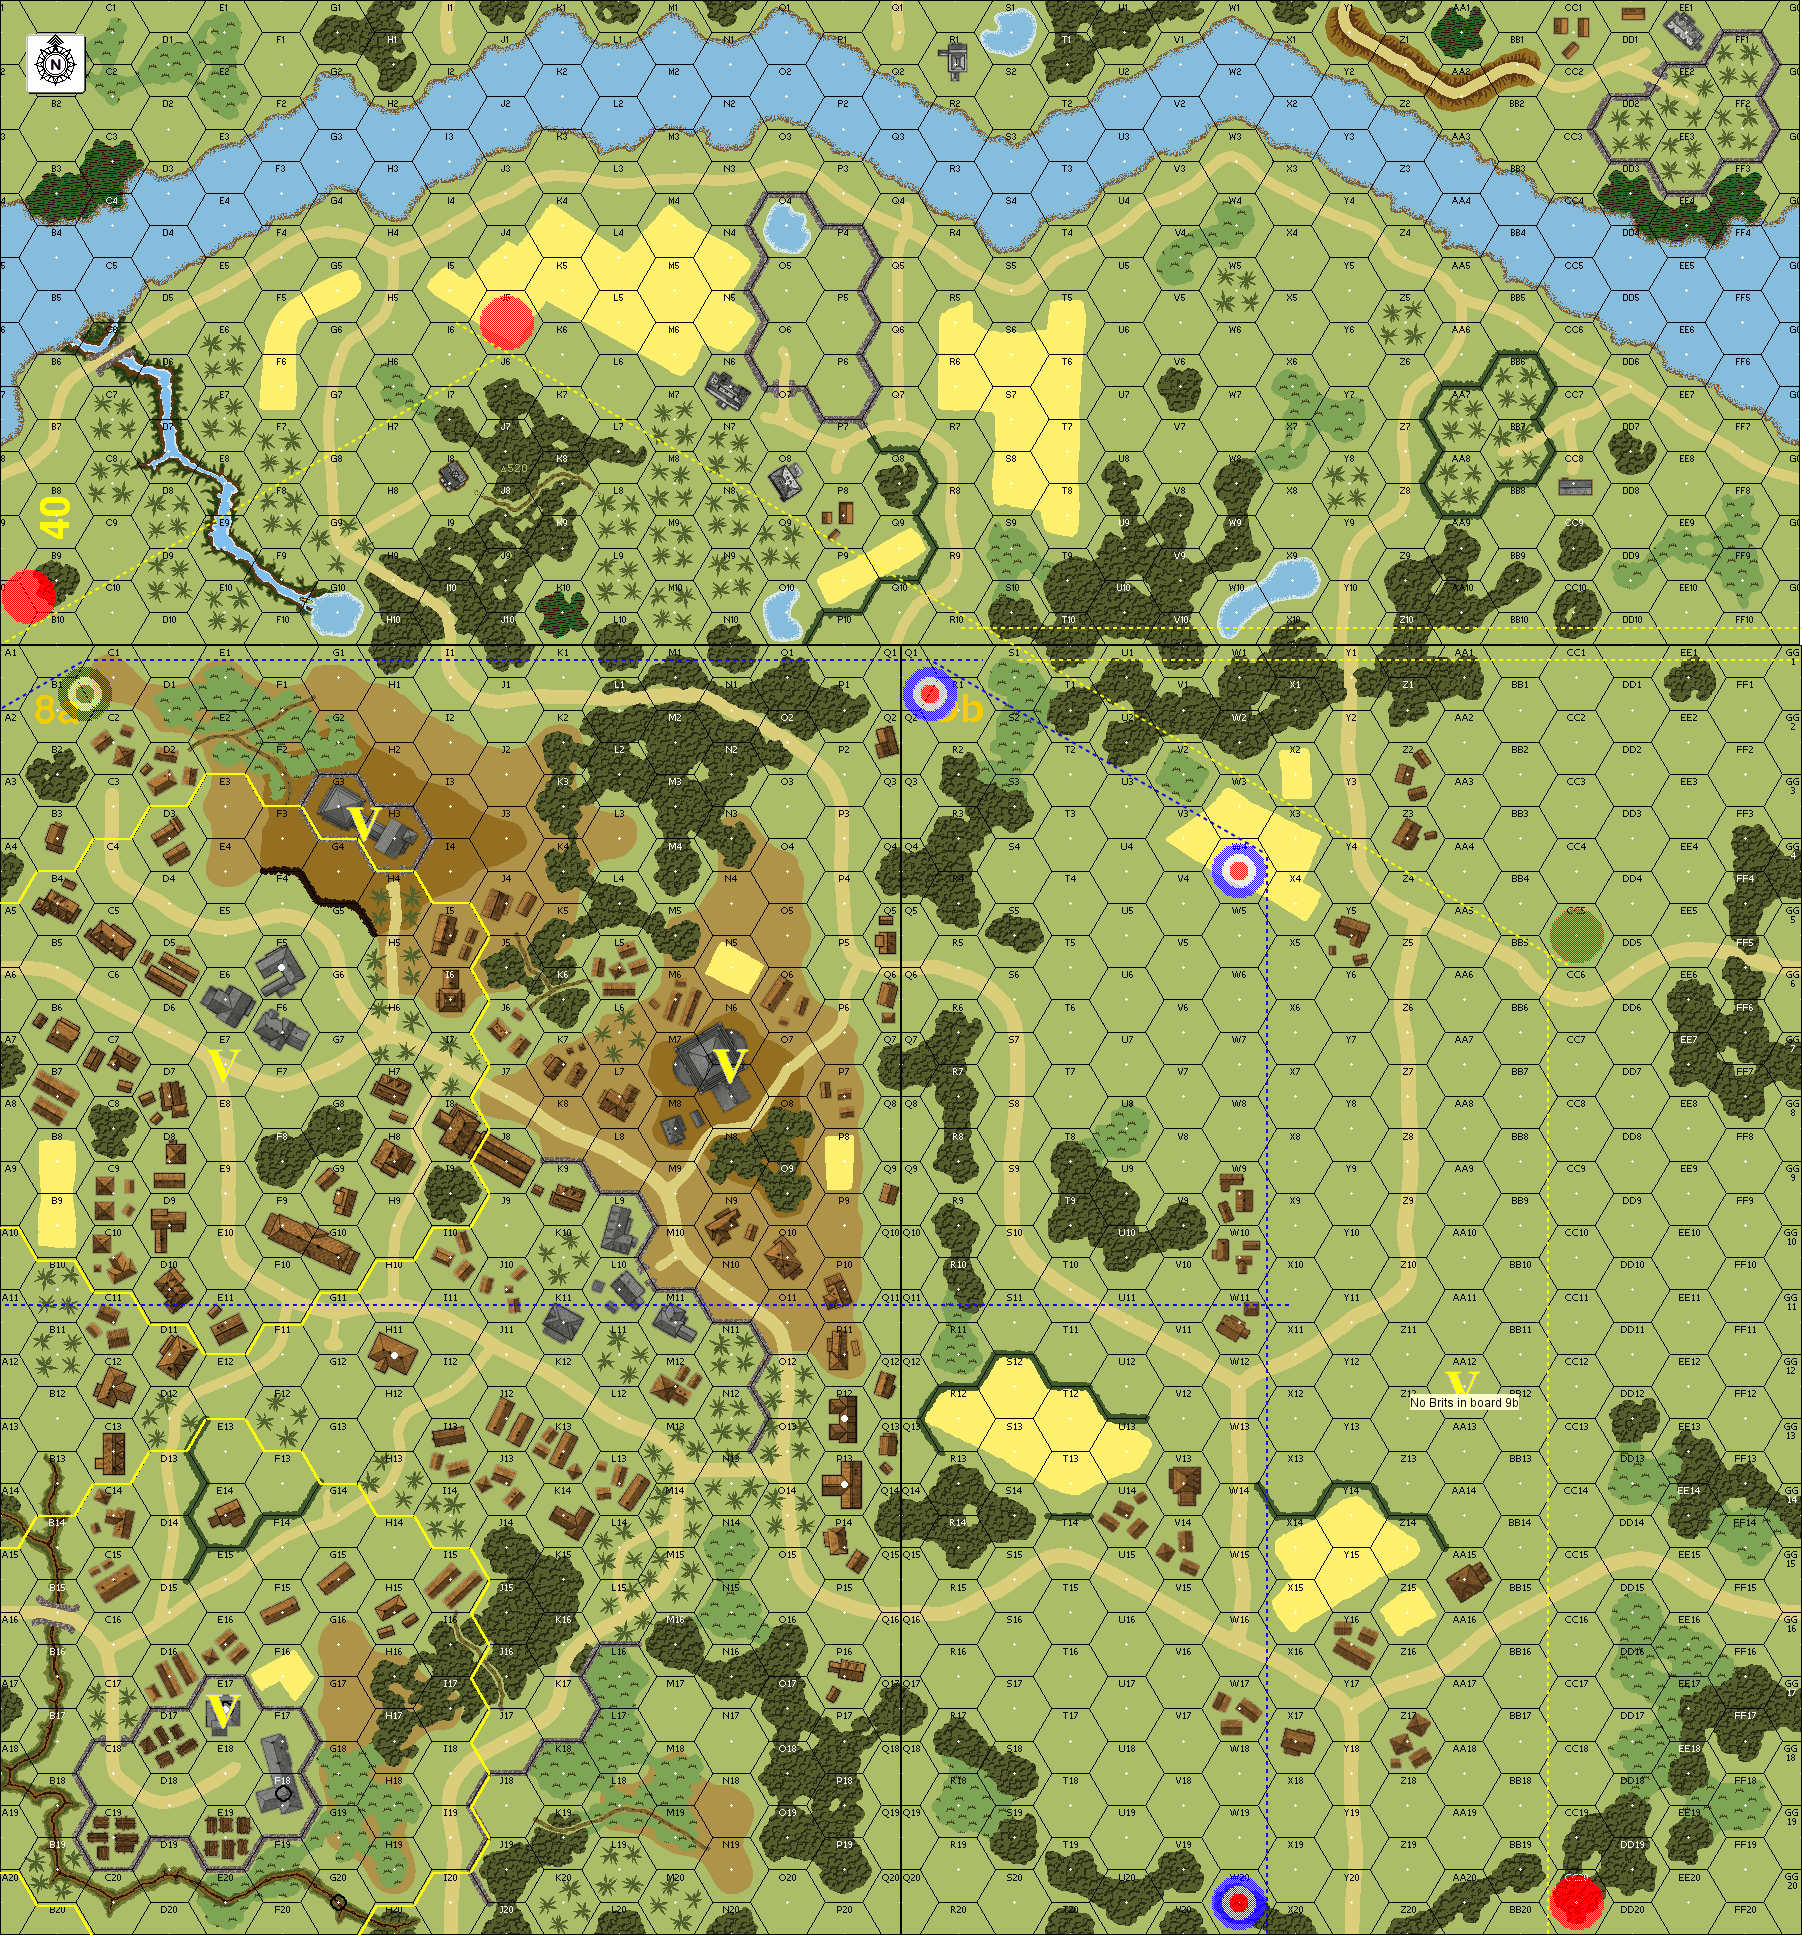
| Map Board(s): |
| Publication | Board |
|---|---|
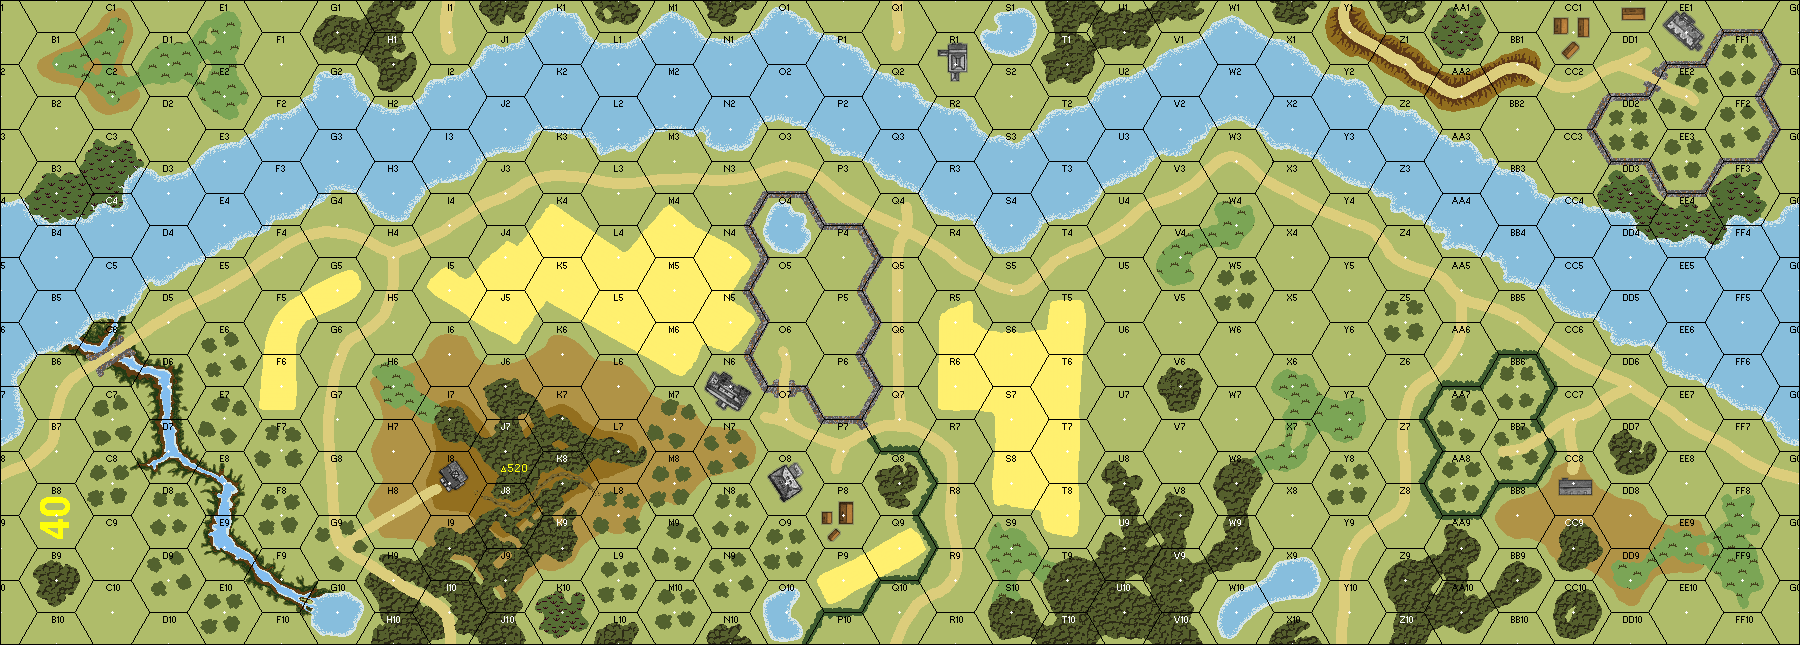
| ASL 3a - Yanks (2nd Edition) | 40 |
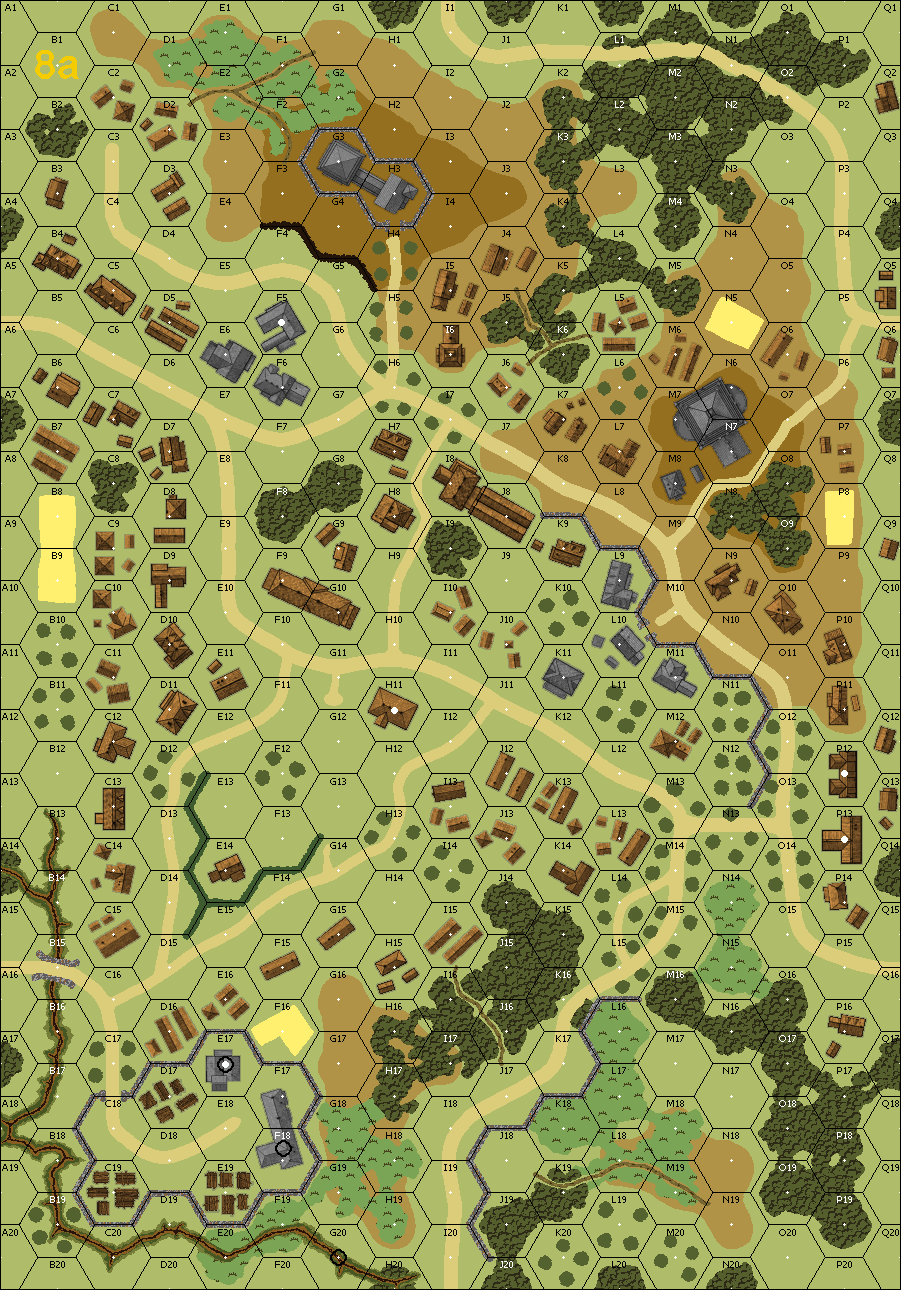
| ASL Action Pack # 9 To the Bridge! | 8a |
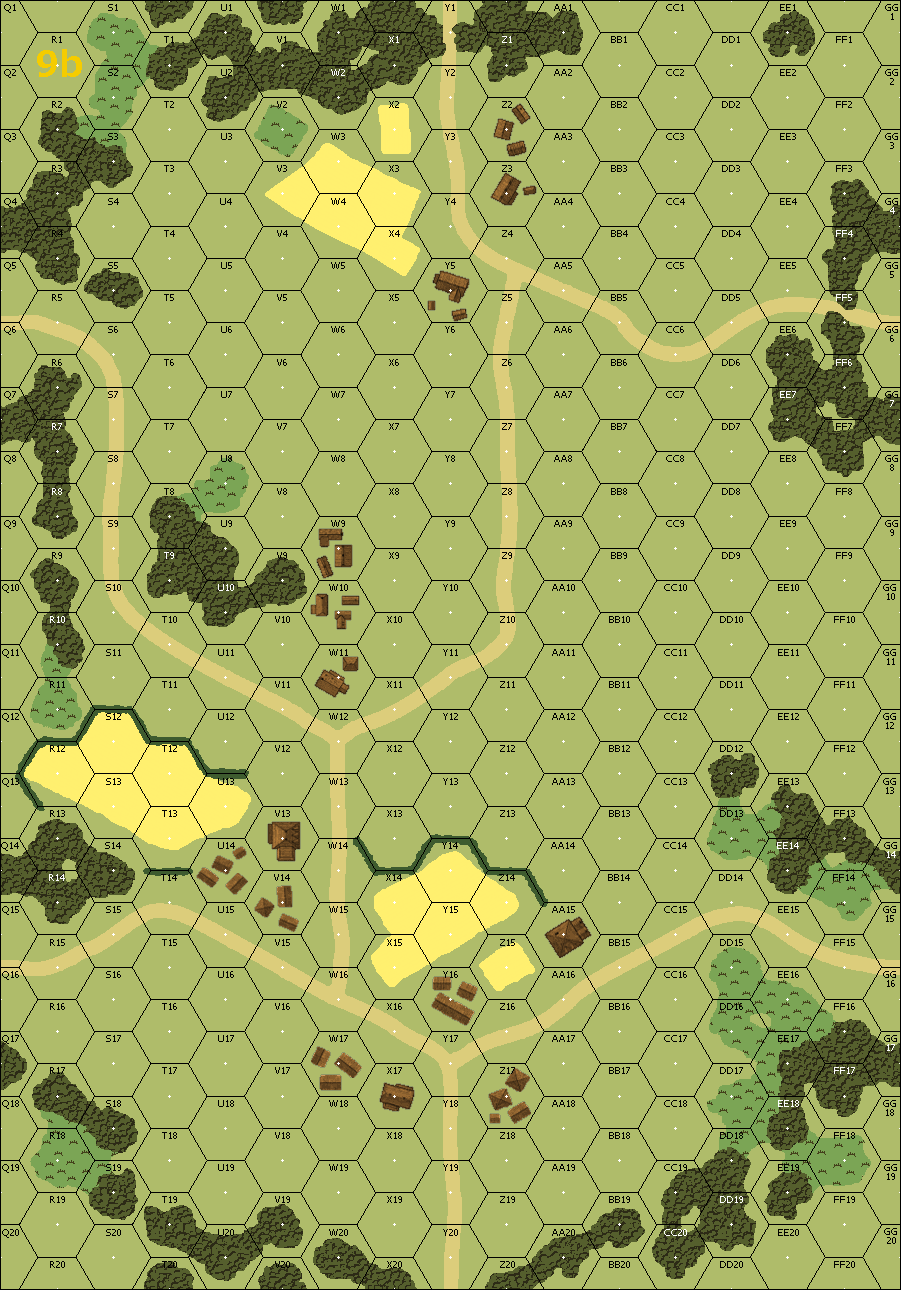
| ASL Action Pack # 9 To the Bridge! | 9b |
| ASL 10 - Croix de Guerre | 40 |
| Overlays: |
Errata (source)
Players wanting to play this game/Request a match:
Scenario info
Last Played:
View all or balance report
| Action | Date |
|---|---|
| Andruz61 Added a playing | 2025-08-17 21:46:38 |
| Hutch Modified the gps location | 2024-04-15 17:31:42 |
| SRenaudin Modified the Defender's Guns | 2022-08-03 10:43:26 |
| SRenaudin Modified the unit counts | 2022-08-03 10:43:26 |
| RJenulis Added a playing | 2021-09-16 17:50:28 |
| File | Description | User | Views |
|---|---|---|---|
| (jap-brit sm.png) | Image | hoxson1 | 1607 |
| (AP87.gif) | Map Image | hipsu | 1786 |
| Description | Uploaded by |
|---|
| Title | Author | Date |
|---|
| Description | Uploaded by |
|---|
