The Mighty Have Fallen PTO (id:#61645)
Baliuag, Philippines
1941-12-31 (7 others)
A 92: Highway 5 (AH:ASL Annual `96)
J11: In the Old Tradition (ASL Journal # 1)
PTO1-4: Battle at Baliuag (Total Pacific Theatre Pack 1)
DP #4: Battle at Baliuag (Digger Pack I)
D22: In the Old Tradition (Deluxe Advanced Squad Leader)
MMP02: In the Old Tradition (MMP News)
FT 329: Gaining time at Baliuag (Franc-Tireur #16)
J11: In the Old Tradition (ASL Journal # 1)
PTO1-4: Battle at Baliuag (Total Pacific Theatre Pack 1)
DP #4: Battle at Baliuag (Digger Pack I)
D22: In the Old Tradition (Deluxe Advanced Squad Leader)
MMP02: In the Old Tradition (MMP News)
FT 329: Gaining time at Baliuag (Franc-Tireur #16)
Designer: Hugh Downing
Starter kit scenario?: Deluxe scenario?:
Balance:
JapaneseAmerican
Overview:
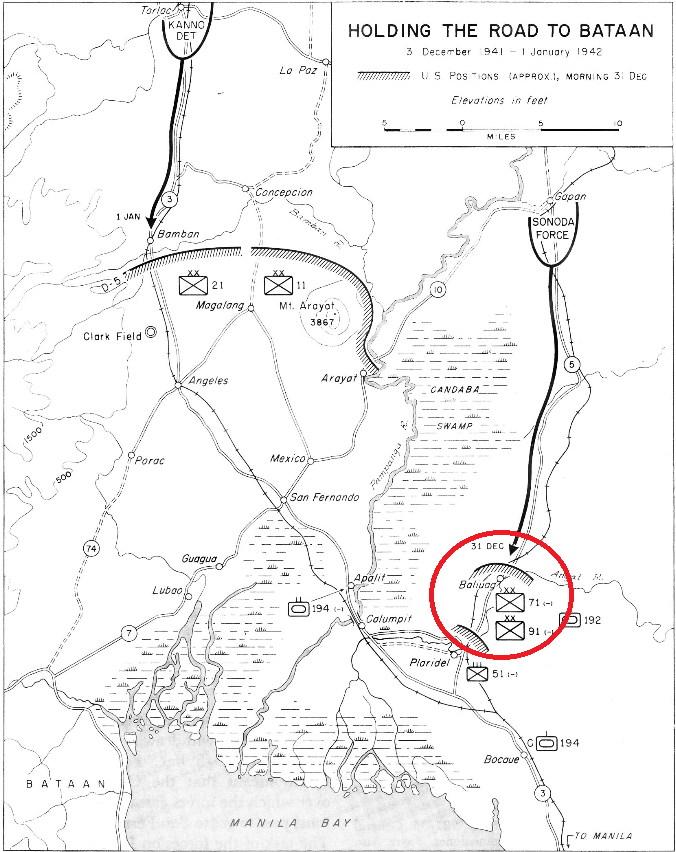
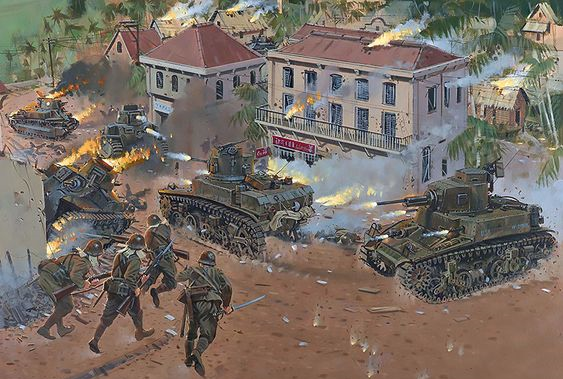
The commander of the Japanese 48th Division, General Tsuchibashi ordered a small task force of infantry and armor to remove the American defenses around the Calumpit bridges. The unit defending this area was General Jones’ U.S. South Luzon Force. General Jones ordered the withdraw of the defending units. The 71st Infantry Division PA had already withdrawn and the 91st Infantry Division PA was executing a fighting withdraw when the main thrust of the Japanese attack hit them. They received armor support from the 192nd Tank Battalion and some 75mm self-propelled mount, halftracks. Through heavy fighting, with tank on tank combat in the streets, the U.S. forces were able to withdraw, thanks to the actions of the rear guard.Attacker: Japanese (Elements I/2nd Formosa Infantry Regt. & 7th Tank Regt., 48th Division)
Defender: American (Elements 91st Infantry Division (PA) & 192nd Tank Battalion)
5.5 turns
Players: 2 OBA: None Night: NoUnit Counts: |
Squads: A:14.0 D:12.0 |
AFVs: A:6 Type 89B CHI-RO x 2 Type 95 HA-GO x 4 |
AFVs: D:5 M3 LT x 3 M3 GMC x 2 |
Guns: A:0 Type 89 Heavy Grenade-Launcher D:0 |
Misc Rules: | PTO, LJ. (Exc: roads and bridge exist). A: may generate 4 T-H or DC Heroes total |
Map Board(s): |
Publication | Board |
---|---|
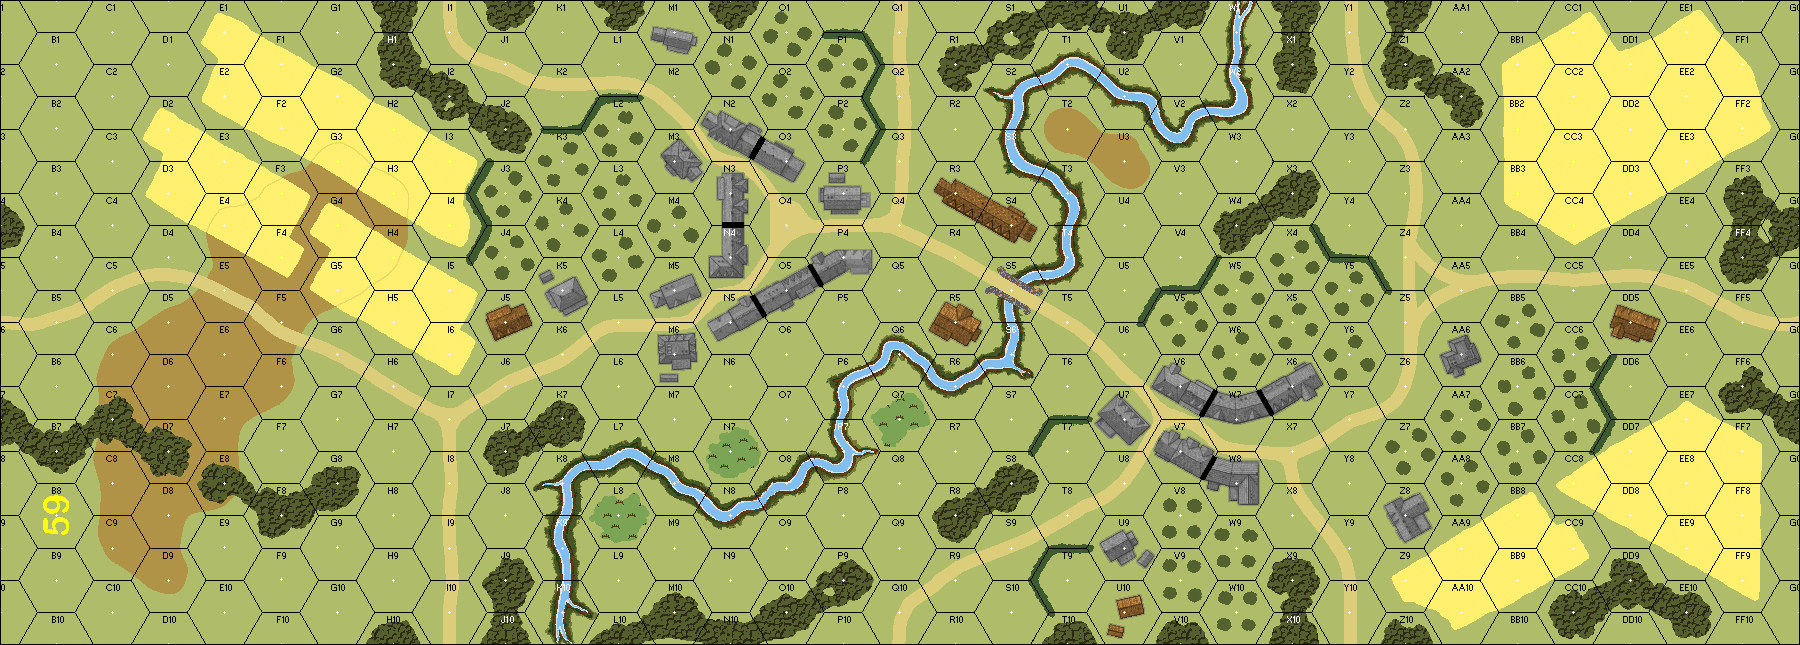
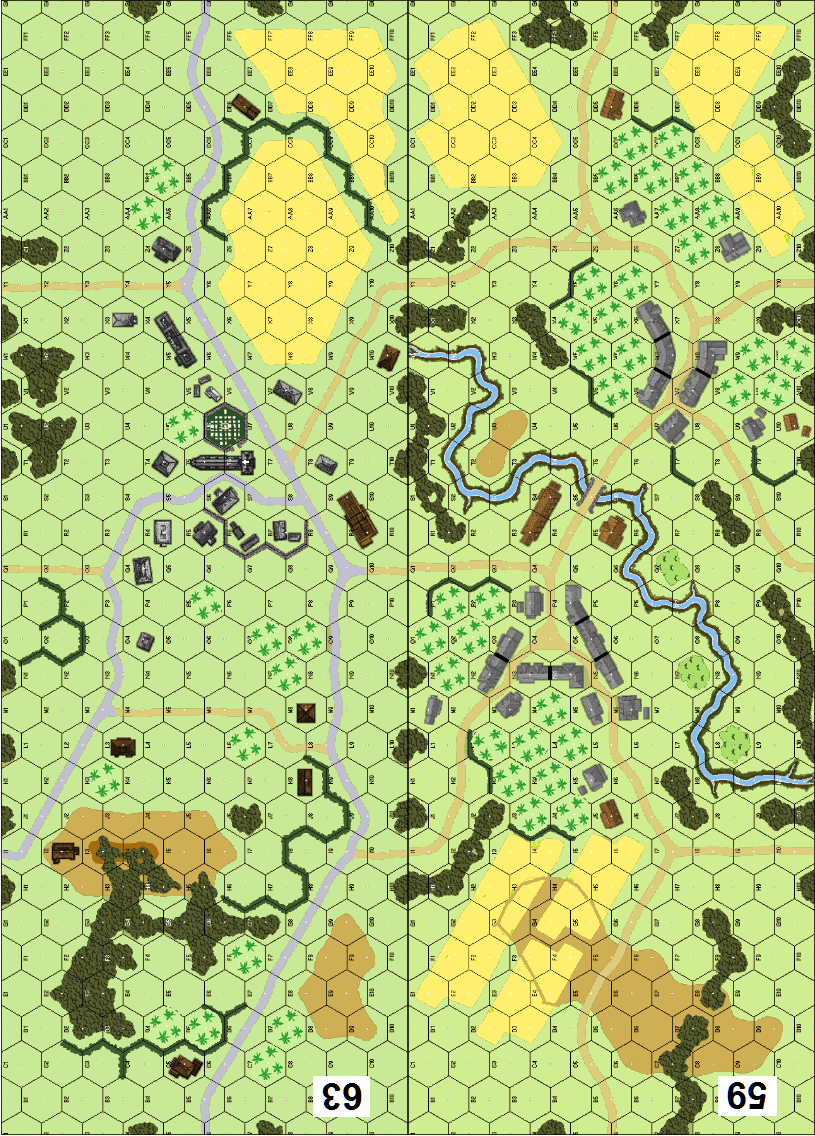
Winter Offensive Bonus Pack 2010 | 59 |
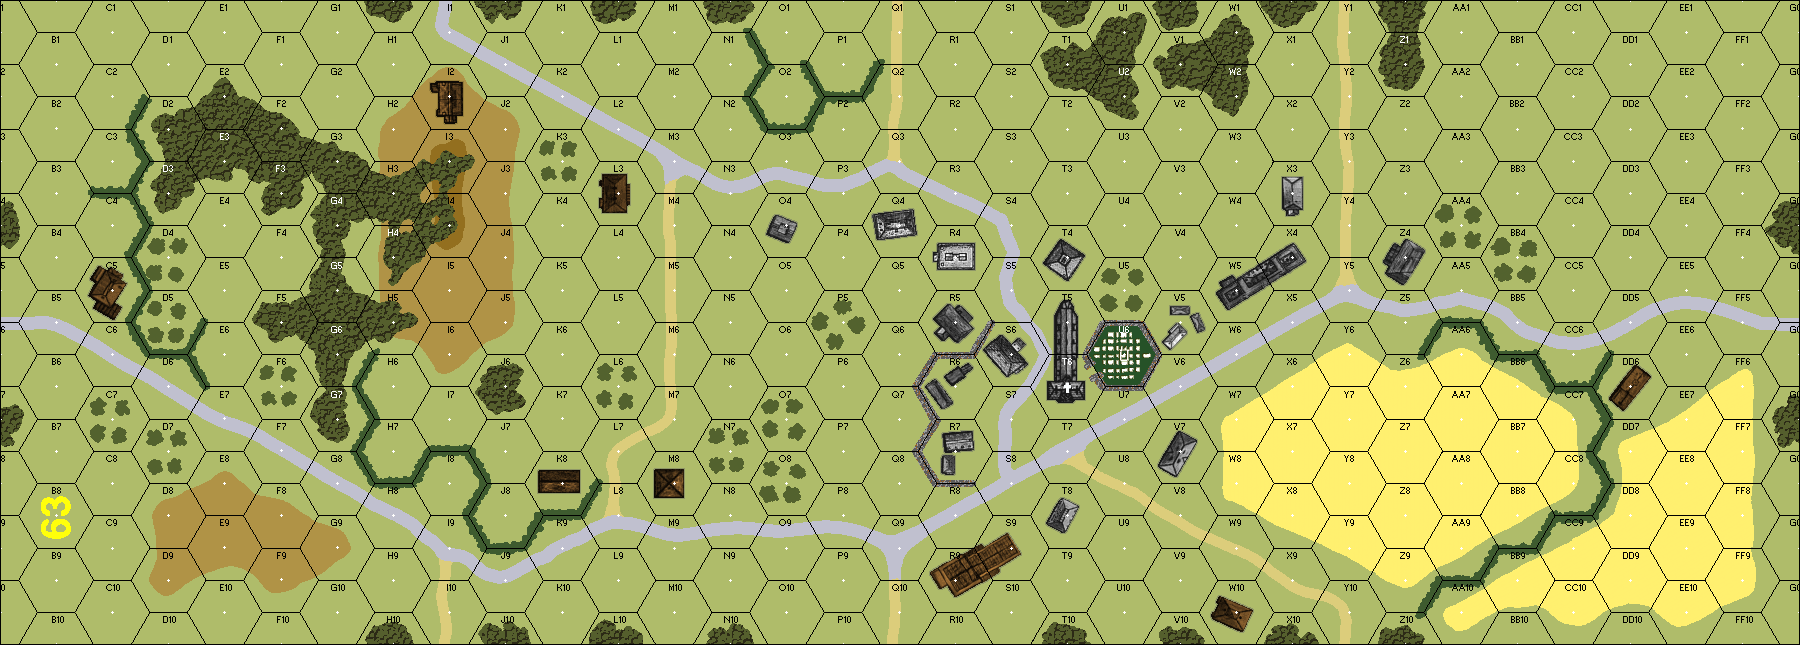
Winter Offensive Bonus Pack 2011 | 63 |
Overlays: | NONE |
Errata (source)
Players wanting to play this game/Request a match:
Scenario info
Last Played:
Date | Reporter | Opponent | Bal. | Result | Time | Comments | |
---|---|---|---|---|---|---|---|
2021-01-10 | (D) Tuomo Lukkari | vs | Hank Wit | Japanese win | [Imported from ROAR] | ||
2020-01-04 | (A) B-E Karlsson | vs | American | Japanese win | |||
2018-06-02 | (D) Andy Beaton | vs | Richard Hooks | American win | Japanese need to be more aggressive than they were, and they need to roll fewer 12s. US lost 1 tank to DC heroes but neither the others or the flamethrower had any effect on the game. | ||
2017-12-04 | (A) X von Marwitz | vs | Ernst Knauth | Japanese win | Interesting PTO-action that pits a more than 50% Elite Japanese force with excellent leadership supported by half a dozen thin skinned tanks against a dozen early US Philippine Army supported by 2 M3 GMC gun-halftracks (HE only) and 3x Stuart (AP only) that are far superior than their armored Japanese counterparts. The Japanese have to clear two of three areas of GO US MMC. Abandoning vehicles is not prohibited, but the Japanese move last. I was the Japanese in this one. The schwerpunkt of my attack came from the west (i.e. long side of board 59) around the Y1 area with the objective of reaching the protection of the stone buildings using armored assault as soon as possible. I screwed this up a little because I forgot that the infantry cannot use "Platoon Movement" in combination with Armored Assault. Unless Banzaiing, of course, but no chance to do this from offboard. So my infantry had less cover initially than I had erroneously hoped for. Nevertheless, though, the infantry got on board reasonably well with one or two stripes. Much worse, though, both leaders up in the west were wounded during the first turn. In the north, I entered 4 Squads, an LMG and DC along with the 10-0 with the objective to move into position for a Banzai charge in Japanese Turn 2 towards the victory area centered on 53X7. To craft this in a way that the HW-direction and ending up of units would be 'right', I had to advance the 10-0 out of the building in AA6 to BB5. To counter my units down there, one of the US ht's sortied out just reaching bypass in 59X3. I figured that my guys would not get hit by it in the AFPh, but hey - this is ASL. The 75mm gun hit my 10-0 who rolled snakes and went Berserk, convincing the 448+DC to accomany him across the open ground towards the ht at a moment's notice. So Berserk Charge and no THH creation because zerkers ain't Good Order. In the ensuing charge, the 10-0 died of a lethal wound and only a zerker HS eventually reached the ht's Location which he eventually managed to burn by means of a thrown DC in the next US MPh. This had screwed my plans up big time, since there would be no Banzai charge towards the victory area with a dead leader and in fact no leader on that flank at all. Two leaders wounded and one dead of a total of four at the start of the 2nd Japanese MPh did not bode good... Up in the west, I ground forward towards the church which housed the US HMG in the Steeple. The Stuart tanks had made a flanking move to 63P1 and O2 beginning to take out my thin-skinned Ha-Go's. Luckily, my MTR found his one and only SMOKE round to put into the Steeple hex, so that fire down to lower levels would be modified by SMOKE. In my second MPh, I was able to extract two of the Ha-Go's from the V4 area, one of them being killed by a Stuart in bypass of V7 when reaching V6. The other one managed, however, to get through and to kill one of the ht's in 63Q9 before it went down soon thereafter. Unfortunately, I misplayed the CHI-RO platoon, not realizing that ESB is NA for Platoon Movement. That way I ended up in Motion as a Large Target in V6 ADJACENT to the Stuart who had exhausted all fire capabilites for the turn unable to stop and was consequently picked off the next US turn. My reinforcements entered in 59A10 to get to rush to the victory area centered on 59O4 as long as the US tanks and HMG were still occupied up in the west. During US Turn 3, his tanks basically finished off mine with all three Stuarts remaining, one in or close to each of the victory zones. After the Japanese having cleared the church by Banzai last half turn the remaining GO US infantry fired on the Japanese from the R9 and T8 buildings without any effect. In the 59X7 victory zone, a Japanese squad was attacked by a Stuart but only striped. A melee in 59V7, ended with both the US and Japanese squad being eliminated. If only the US had survived, this would have been a problem for the Japanese. In the 59O4 victory zone a broken US squad recovered, but there were not enough forces left or in position to inflict damage on the Japanese poised to close in. In Japanese Turn 4, the Infantry closed in to the O7 victory zone losing a HS in H-t-H and killing a US HS. The US had 2x447 with 8-0 and a Stuart left in the middle surrounded by two Japanese squads, two HS, two LMGs and the 9-1 that would be able to attempt getting close and personal in the next Japanese turn. At the same time, moving some of these US forces out, would have weakend the position there overly, so there was no sense in attempting to reinforce the 63Q7 victory zone from there. With the 59X7 victory zone pretty safely in Japanese hand and only one GO vehicular crew left in the 63Q7 victory area along with two broken squads at the start of US Turn 4, my opponent conceded. The Japanese will have to attempt to bring in their at start forces with the least damage possible before they can reach the protection of the stone buildings. The Japanese tanks will eventually go down to the Stuarts. Their best use is probably to go after the more vulnerable US ht's that pack some punch vs. Infantry with their 75mm Gun. Then, thoughtful consideration needs to be taken where to enter the Japanese reinforcements so that they can have the best effect. In my game, there was a window of opportunity to do so from 59A10 which paid off to use as it ultimately allowed me to bind US forces to the 59O4 victory area that could otherwise have reinforced the other two victory locations. After the first turn, I was very concerned about the misfortune that befell 75% of my leaders that were either dead or limping behind. In some cases, though, a wounded leader might be better for starting a Banzai charge as an unwounded one. In the many H-t-H combats (mostly after Banzai Charges), the US gave as good as they got. Despite at disadvantage being Lax after a charge, I don't believe the Japanese can do without them. My FT was used rather sparingly. It helped, however, to scare away the Stuarts approaching ADJACENT and broke an important US squad. Altogether, this scenario was fun to play. | ||
2014-10-07 | (A) Paolo Cariolato | vs | Mario Aceto | Japanese win |
Action | Date |
---|---|
hoxson1 Linked the scenario to ROAR | 2024-09-24 22:22:26 |
hoxson1 Modified the Attacker's Guns | 2024-09-24 22:21:51 |
hoxson1 Modified the unit counts | 2024-09-24 22:21:50 |
usmcwo1 Added a playing | 2023-03-10 20:49:06 |
Bongiovanni Added a playing | 2023-02-28 12:22:10 |
File | Description | User | Views |
---|---|---|---|
(!jap-usa.png) | Image | hoxson1 | 972 |
"The fight at Baliuag, December 31, 1941", Howard Gerrard (baliuag fight art.png) | Image | hoxson1 | 1062 |
(baliuag battle map.png) | Image | hoxson1 | 982 |
VASLMap (SP213-VASLMap.png) | Map Image | bkemp01 | 1169 |
(mighty_fall_PTOish.png) | Map Image | hoxson1 | 925 |
Description | Uploaded by |
---|
Title | Author | Date |
---|
Description | Uploaded by |
---|
Location
Not found
Images
"The fight at Baliuag, December 31, 1941", Howard Gerrard
Statistics: | |
Avg Rating: 6.50 | Votes: 6 |
Views: | 4185 |
To-Play list count: | 0 |
Estimated Play time: | 5.7 hours |
Recorded Games: | 7 |
Archive recorded plays: | ||
Japanese | 5 | |
American | 2 | |
Drawn: | 0 |
ROAR Data: (as of today) The Mighty Have Fallen [Confirmed] |
[A] Japanese | 19 |
[D] American | 10 |