Hell Wouldn't Have It PTO (id:#57824)
(Revision: MMP: HASL 5 - Blood Reef: Tarawa BRT5)
Betio Island, Tarawa Atoll, Gilbert Islands
1943-11-22 (14 others)
67: Cibik's Ridge (ASL 9 - Gung Ho!)
BRT03: Ryan's Orphans (HASL 5 - Blood Reef: Tarawa)
BRT05: Hell Wouldn't Have It (HASL 5 - Blood Reef: Tarawa)
BRT07: Didn't Have to Be There (HASL 5 - Blood Reef: Tarawa)
J84: Makin Taken (ASL Journal # 5)
LN2-7: "Forlorn Hope" (Leatherneck 2)
BR 2: Damn Army (Blood Reef Tarawa)
BFP-49: Just a Drive Along the Beach (BFP 3: Blood and Jungle)
67: Cibik's Ridge (ASL 13 - Rising Sun)
BETIO #5: Killing Ground (Tarawa: Red Beach - Blood Tide)
BETIO #6: Newsmakers (Tarawa: Red Beach - Blood Tide)
BETIO #8: Bonnyman's Forlorn Hope (Tarawa: Red Beach - Blood Tide)
FT297: “Black Beach Rendezvous” (From The Cellar Pack #10)
67: Cibik's Ridge (ASL 13 - Rising Sun (2021))
Designer: Eddie Zeman and Steve Dethlefsen
Starter kit scenario?: Deluxe scenario?:
Balance:
JapaneseAmerican (USMC)
Overview:
Ny 1930 on D+2 General Smith had taken command of his Second Division on shore. Plans were made for the 6th Marines to clear up the remaining 1,000 or so Japanese Rikusentai. Incredibly by the third night the expected Banzai attack had not materialized. A counterattack on D-Day could have forced the fragile beachhead into the lagoon, stalling American offensive plans for months. The Death of General Shibasaki on D-Day while he was moving his command to another area so that his wounded could use his command bunker, defeated all attempts of an intelligent counterattack. By D+2 the defenders were forced into the narrow "tail" thus allowing the Rikusentai the chance to marshal their forces for the final attempt to force the Americans into the sea.Attacker: Japanese (6th Special Base Force/Main Assault)
Defender: American (USMC) (A and B Companies, 1st Battalion, 6th Marines)
8 turns
Players: 2 OBA: American (USMC) Night: Yes| Unit Counts: |
| Squads: A:20.0 D:11.0 |
| AFVs: A:0 |
| AFVs: D:1 M4A2 |
| Guns: A:0 D:0 M2 60mm Mortar |
| Misc Rules: | BRT SSR, Night (E1), A: Banzai (G1.5) Turn 2 |
| Map Board(s): |
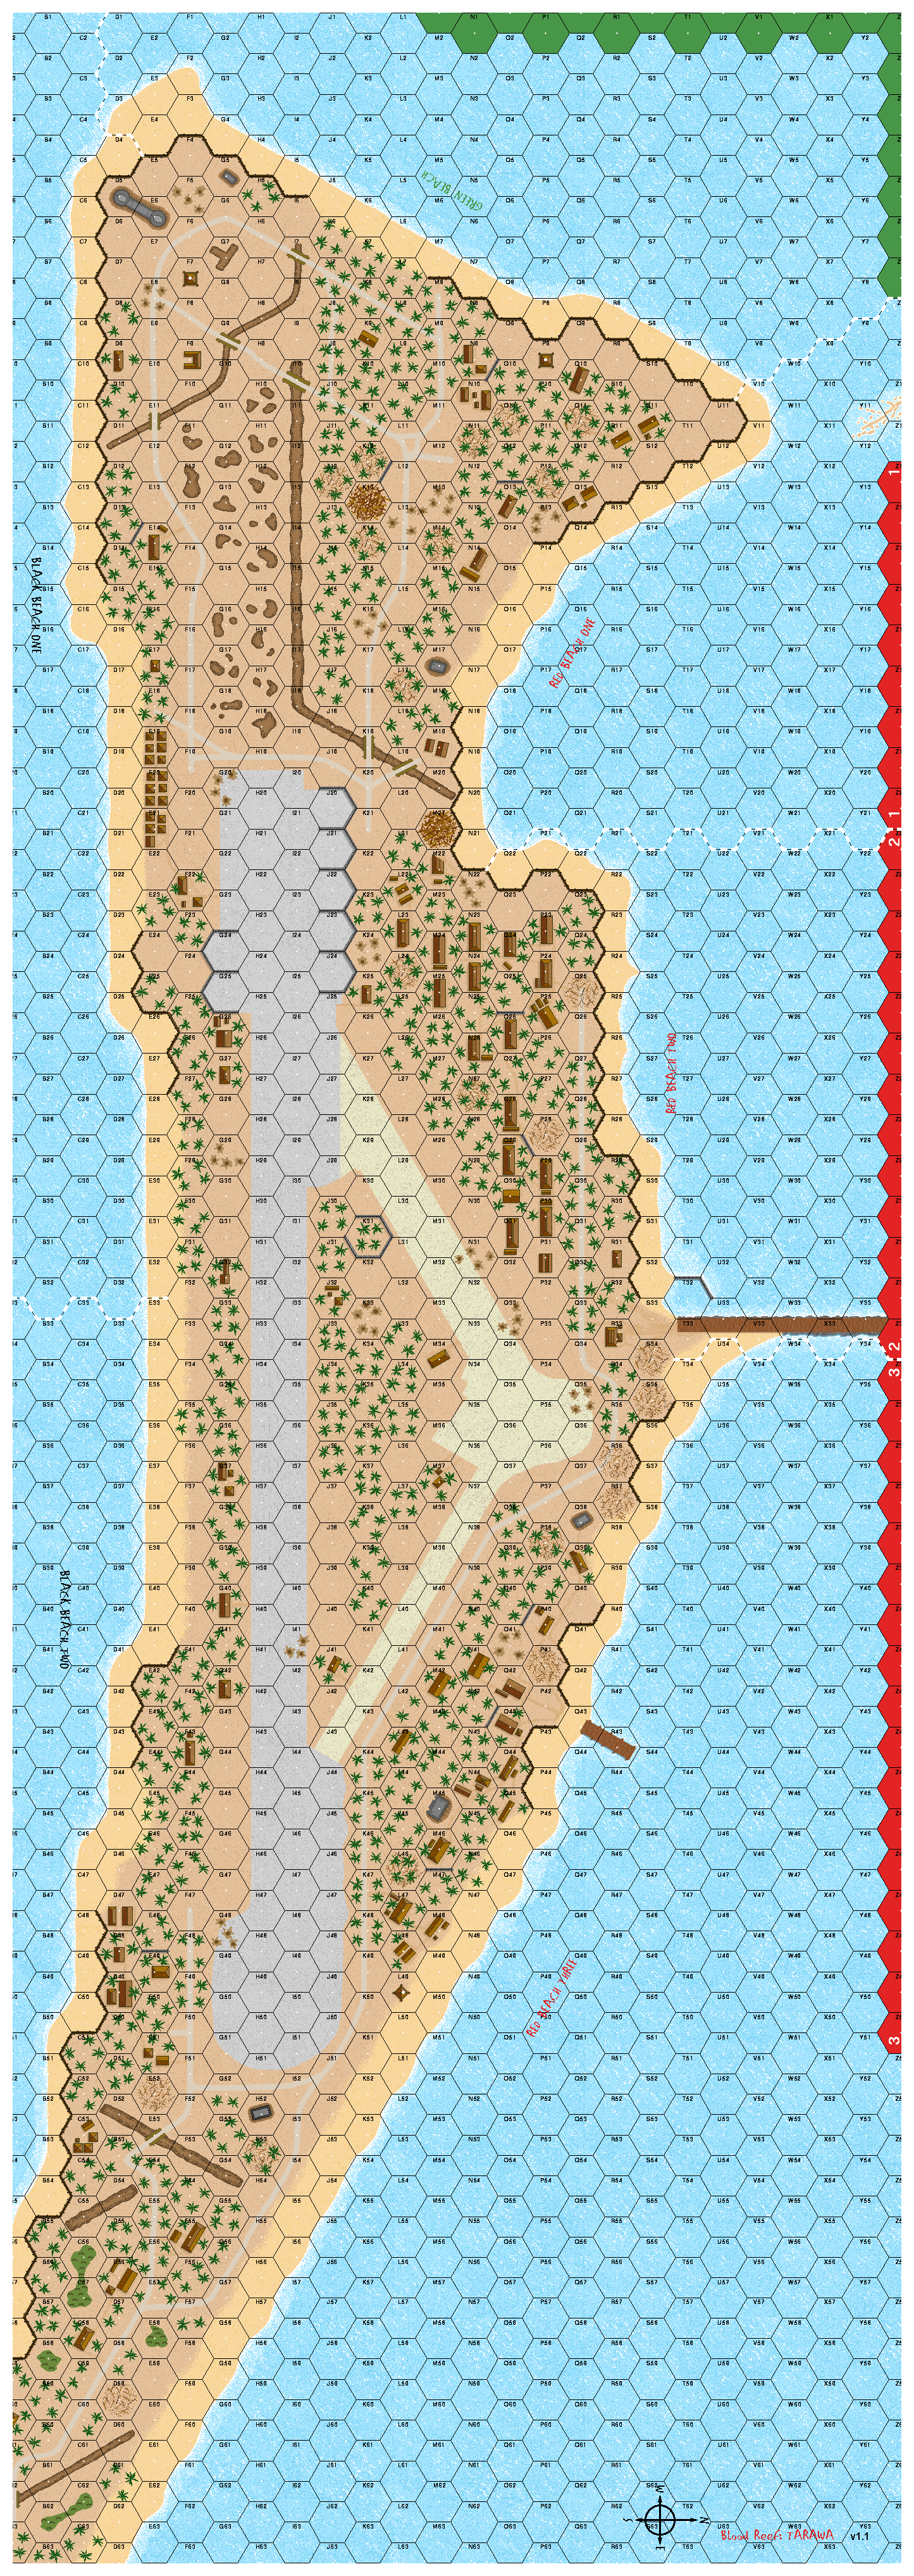
| Overlays: | NONE |
Errata (source)
Players wanting to play this game/Request a match:
Scenario info
Last Played:
| Date | Reporter | Opponent | Bal. | Result | Time | Comments | |
|---|---|---|---|---|---|---|---|
| 2008-08-20 | (A) Brian Blad | vs | John Bock | American (USMC) win | Difficult for Japanese to win |
View all or balance report
| Action | Date |
|---|---|
| Hutch Modified the overview | 2024-12-12 10:59:09 |
| Hutch Modified the gps location | 2024-12-12 10:28:09 |
| Hutch Modified the unit counts | 2024-12-12 10:26:00 |
| Hutch Modified the misc. rules | 2024-12-12 10:24:07 |
| Hutch Updated the Victory Conditions | 2024-12-12 10:21:27 |
| File | Description | User | Views |
|---|---|---|---|
| (night jap-usmc.png) | Image | hoxson1 | 1684 |
| Description | Uploaded by |
|---|
| Title | Author | Date |
|---|
| Description | Uploaded by |
|---|
Quick Map View
No Map available yet! Please create one, or upload a map image file...
Location
Images

| Statistics: | ||
| Avg Rating: 5.00 | Votes: 2 | Views: | 5670 |
| To-Play list count: | 0 | |
| Estimated Play time: | 9.9 hours | |
| Recorded Games: | 1 | |
| Archive recorded plays: | ||
| Japanese | 0 | |
| American (USMC) | 1 | |
| Drawn: | 0 | |
| ROAR Data: (as of today) Hell Wouldn't Have It [Confirmed] |
| [A] American | 1 |
| [D] Japanese | 0 |